
The BamHub gives you powerful control over your Bambuser Chat experience. To help you perfect your setup, we've put together this simple guide that explains each adjustment you can make and top tips on how to get the best out of every setting.
There are three types of settings, which change different aspects of the experience:
On-site chat
Store App
Account
On-site Chat overview
Configuring On-site Chat 💬
From Chat Settings, you can change how shoppers experience the Bambuser Chat On-site Chat feature.
Check out each section for more details on the different aspects of On-site Chat that you can customize:
Supported languages
Custom theme
Photo and video sending
Privacy policy URL
Terms and conditions URL
Customize text
You can go beyond how On-site Chat looks to shoppers and change the rules for when it is displayed, for example, if it's outside of your opening hours, or no one in your team is available on the Store App. Learn more about how to edit display settings here:
Supported languages
Setting the right language 🌎

An example of On-site Chat in English and Japanese.
Language configuration lets you set the language that On-site Chat displays.
When a shopper lands on a webpage, they will see On-site Chat in the language in the preference hierarchy that the shopper has set for their web browser.
You can select any of our available languages to be available. Where a shopper's browser is in a language that you haven't selected or that otherwise isn't supported, they'll see Bambuser Chat in the default language, English.
For a consistent experience, we recommend adding supported languages to match the languages your store team members are likely to use in a chat.
Which languages are supported?
Currently, On-site Chat and the Store App are available in the following languages:
English, Danish, German, Spanish, Finnish, French, Italian, Japanese, Korean, Dutch, Norwegian, Polish, Portuguese, Swedish, Chinese (Traditional), and Chinese (Simplified).
Custom theme
Setting the colors of On-site Chat 🌈
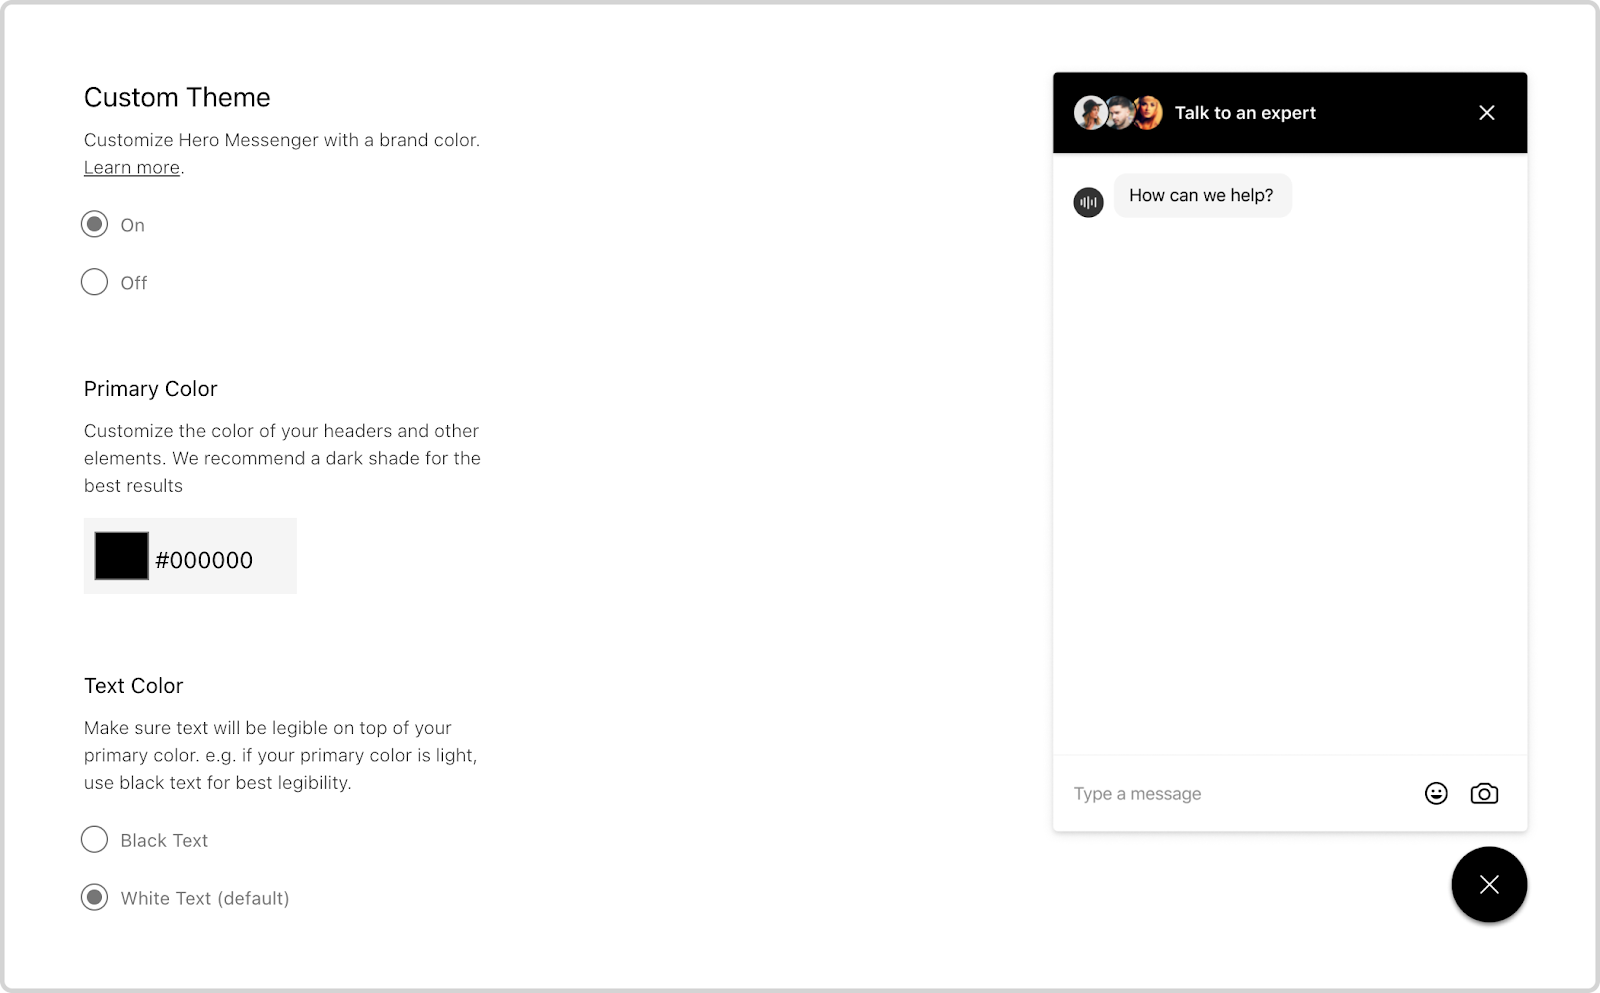
Under Custom Theme, you can customize the primary color and text color of On-site Chat. By switching Custom Theme on, you will be prompted to choose a primary color for the chat plugin. Note: the secondary color is always white.
To set your preferred color:
- Enter a hexadecimal code value in the text input field.
- Click on the square next to the input color to bring up your browser's color picker tool. You can then set the color via RGB, HSL, the eyedropper tool, or a sliding scale.
If you have set a primary color, you'll also be prompted to choose black or white for your header text. This is the text in the bar at the top of On-site Chat. Make sure to choose whichever option has more contrast with your chosen background color to keep it legible.
In most cases, we recommend using the default colors for On-site Chat (black and white) as it tends to provide a consistent look and feel
Photo and video sending
Letting shoppers send photos and videos 📹
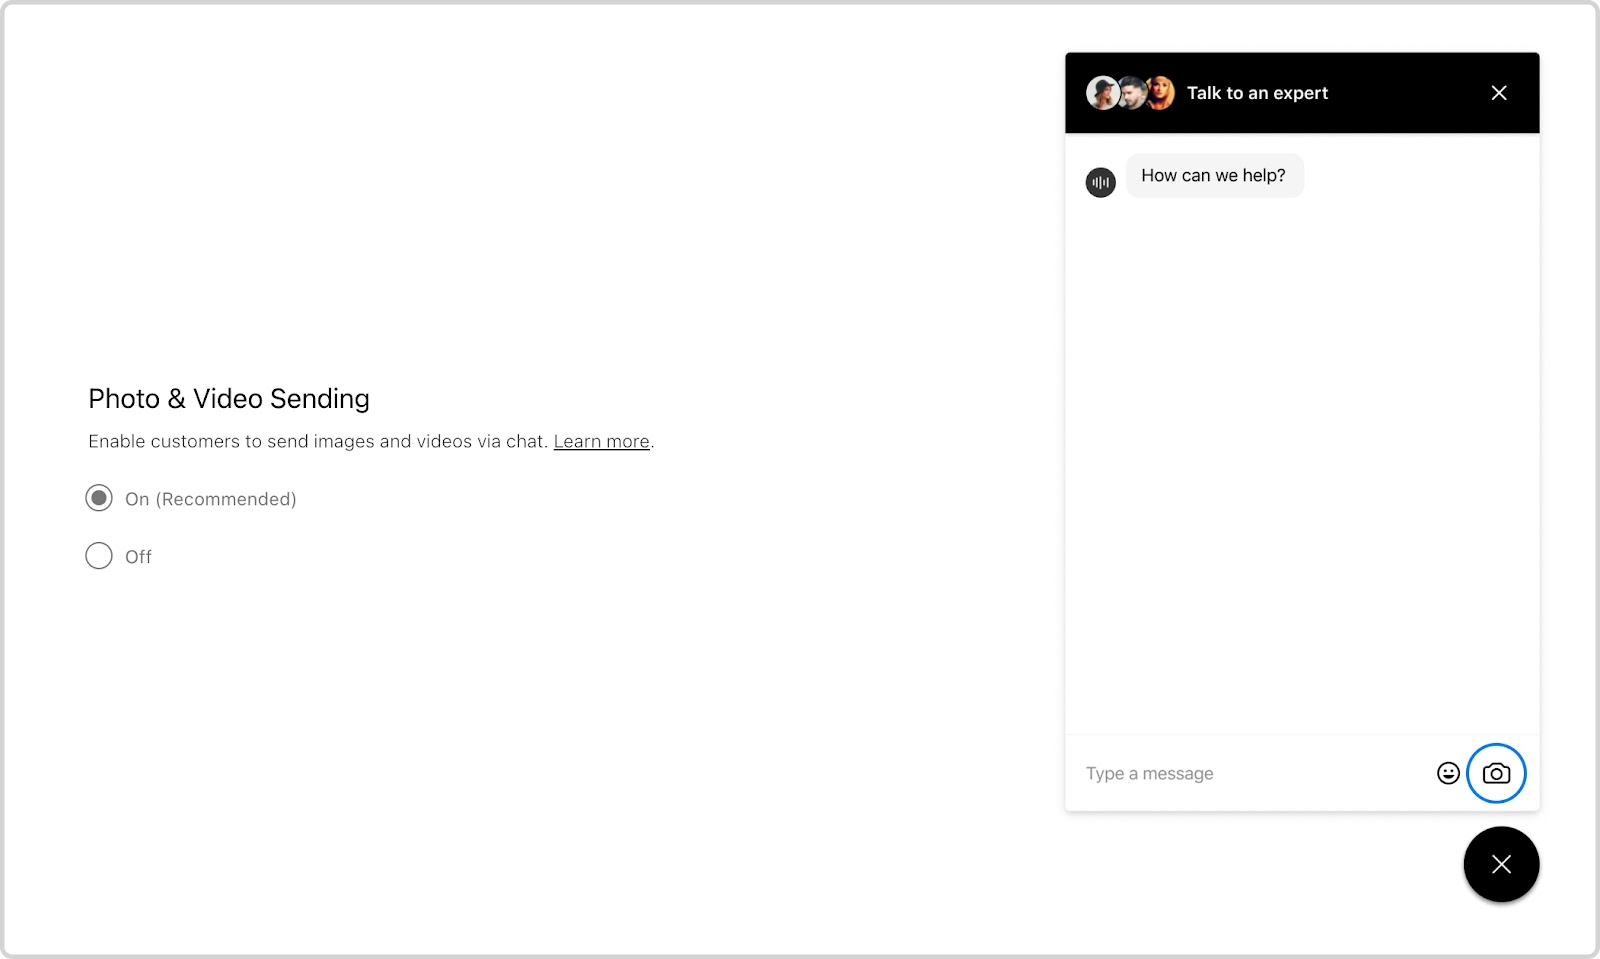
The Photo & Video Sending setting lets you determine whether shoppers can send media files such as pictures and videos to store teams during a chat.
When this option is switched on, you'll need to also make sure photo sharing is switched on for the Store App on your team's devices.
During a chat, shoppers will often ask for context-specific advice. To share that context, shoppers may choose to send teams pictures or videos of other items in their wardrobe, a piece of furniture in their home, and much more.
By switching this setting on, you can give shoppers the ability to send store teams photos or brief videos over the On-site Chat. If this setting is switched off, shoppers will not have this option.
Regardless of whether this is on or off, experts will always be able to send videos and photos from the Store App to the shopper. This setting only applies to shoppers sending media to experts.
In most cases, we recommend switching on photo and video sending, but this will not always be the best choice for you. To learn more about this setting, please contact your Customer Success Manager.
Privacy policy URL
Linking shoppers to your privacy policy 🔐
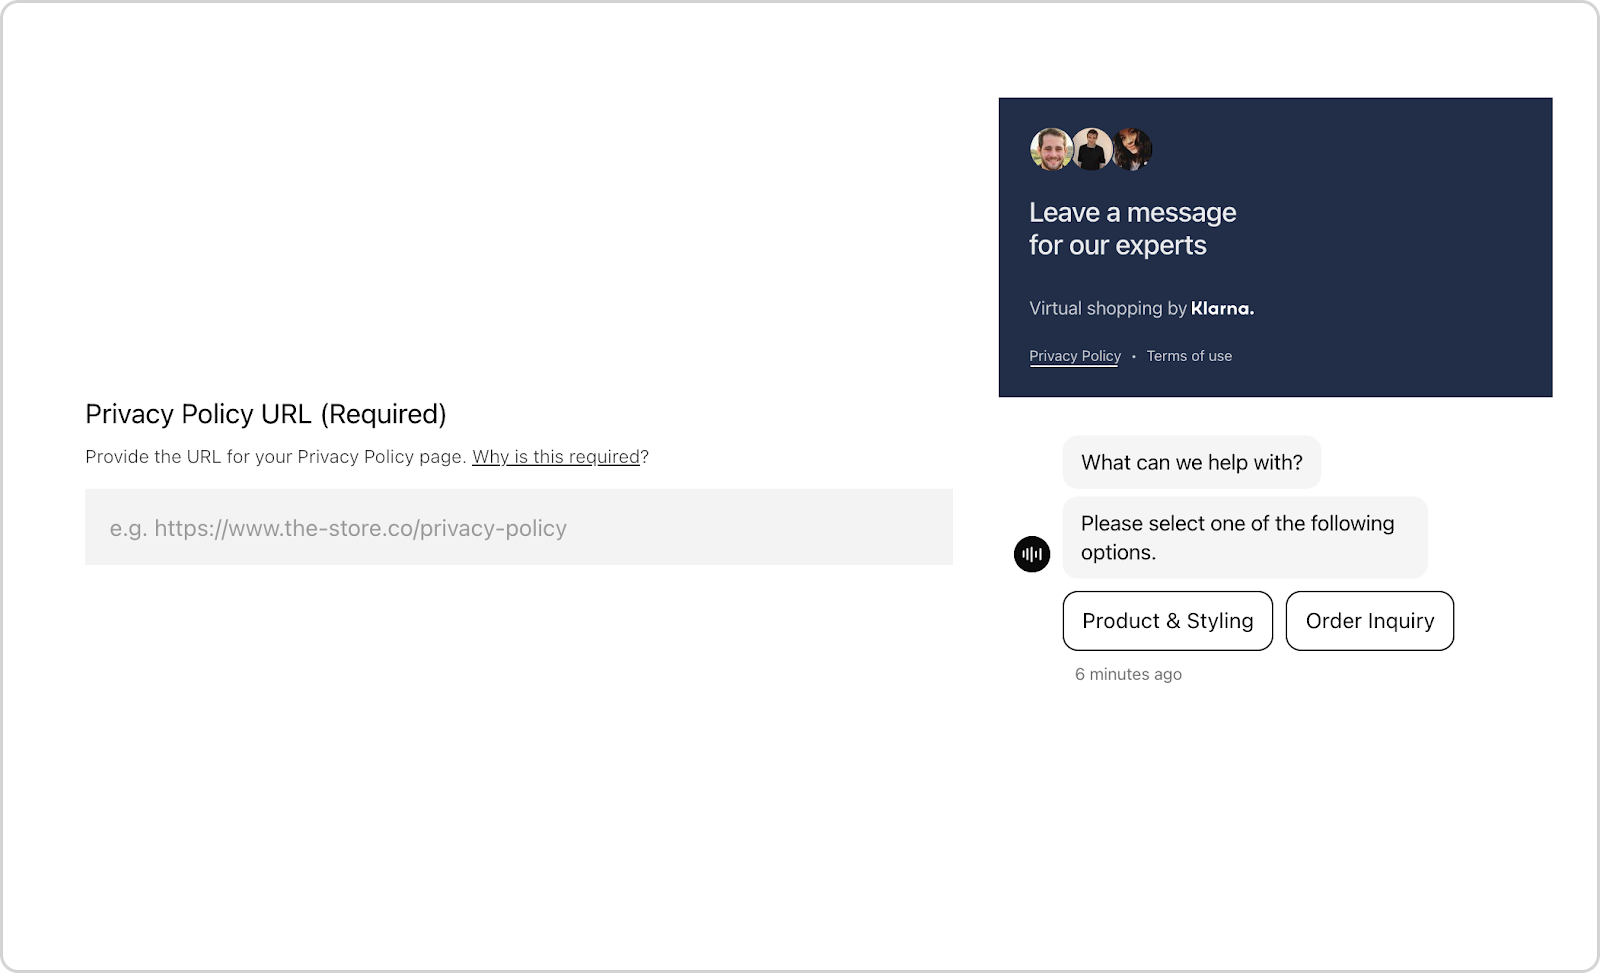
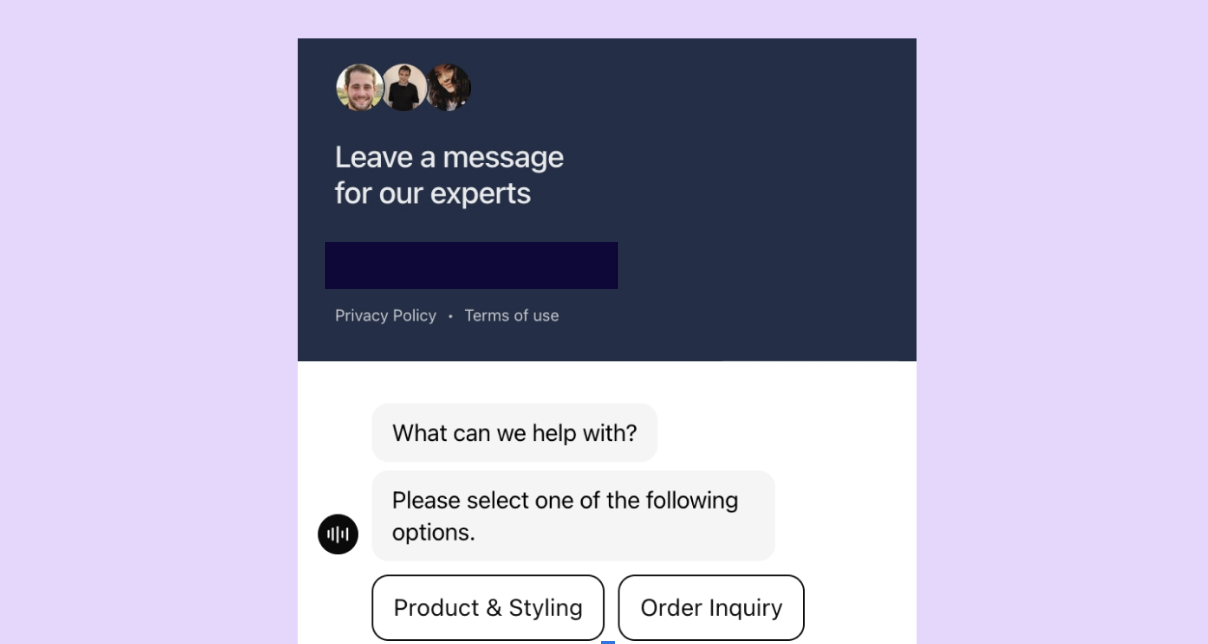
Here, you can set the URL to which shoppers will be directed if they click on the privacy policy link in the On-site Chat plugin. This is displayed to shoppers at the beginning of a chat.
Simply copy and paste the URL for your Privacy Policy into the text field.
Terms and conditions URL
Linking shoppers to T&Cs 📜
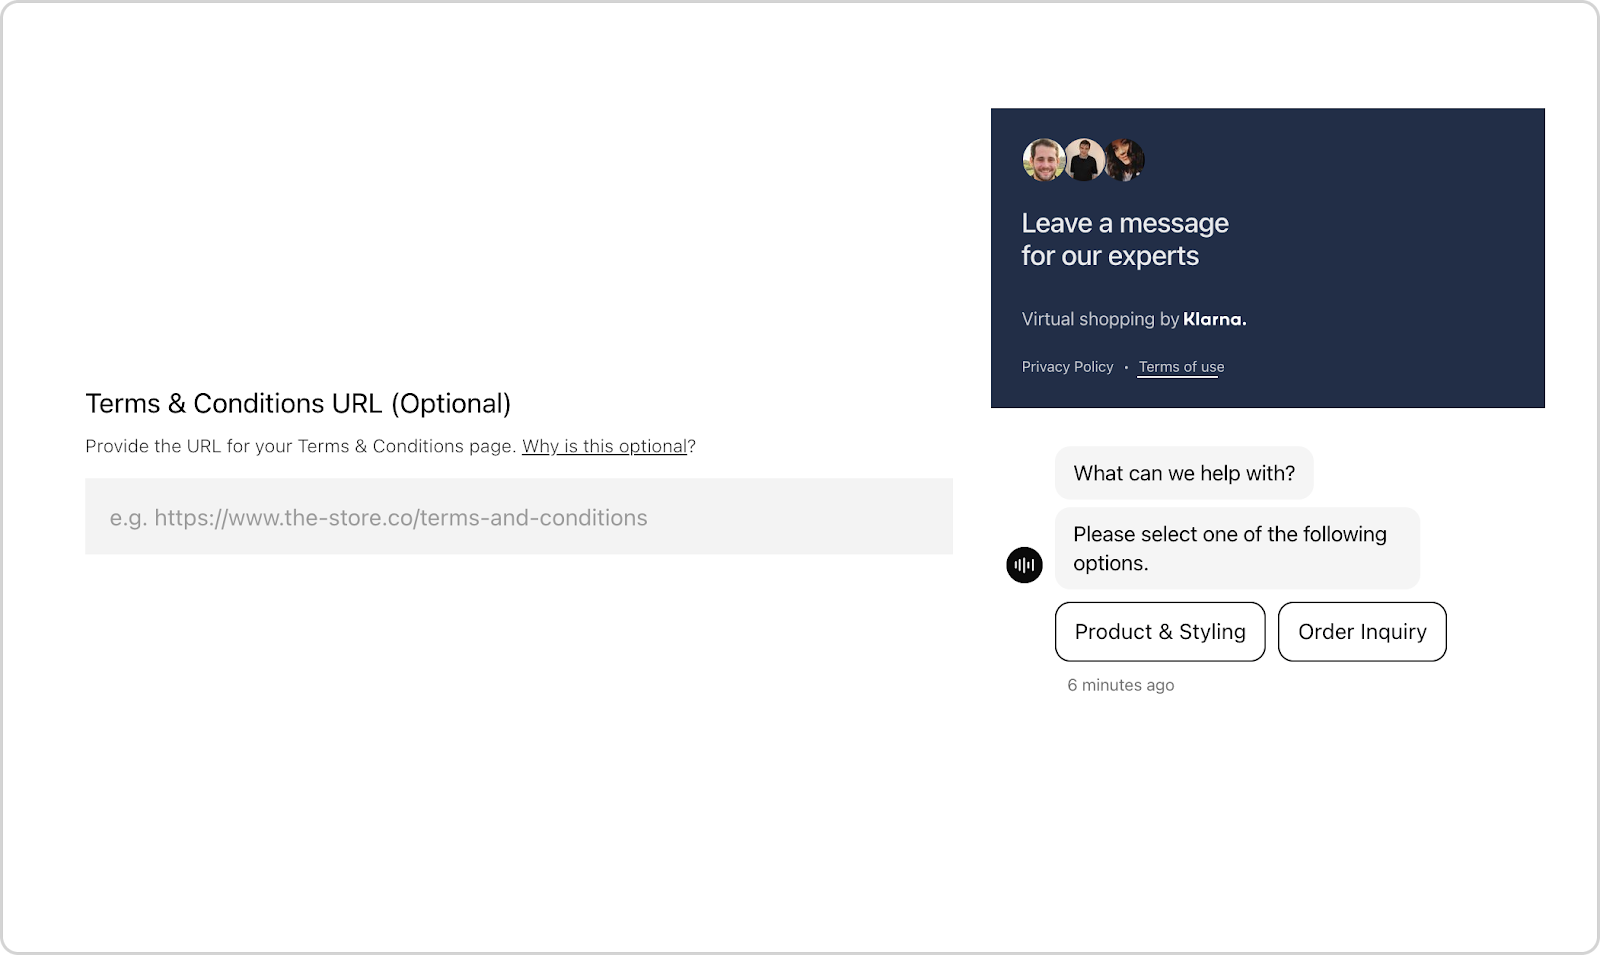
Here, you can set to which URL shoppers will be directed if they click the Terms & Conditions link in the On-site Chat plugin. This is displayed to shoppers at the beginning of a chat.
Simply copy and paste the URL for your Privacy Policy into the text field.
In many cases, we recommend using the Terms & Conditions configuration but this setting is optional. To learn more about this setting please contact your Customer Success Manager.
Customer service URL
Redirecting shoppers to Customer Service 💁
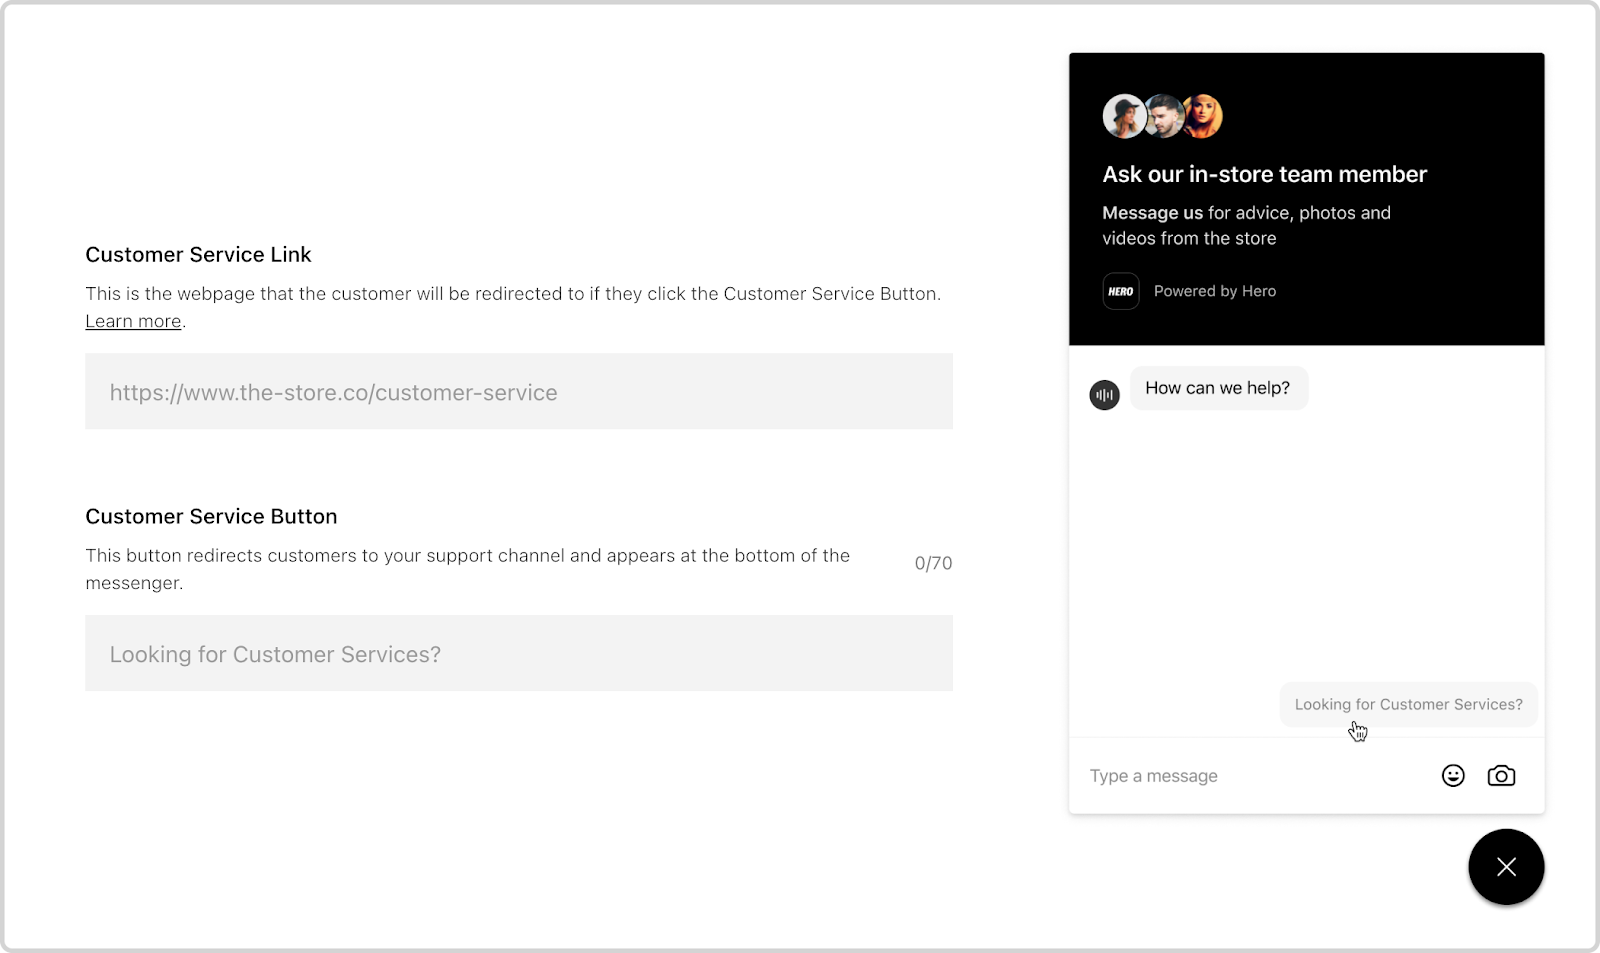
In the Customize Text tab of On-site Chat Settings, you can set up a redirect link to your customer service, so that your store teams can focus on sales and shoppers can get help from the right person if they have a customer service query.
If you've chosen to customize the On-site Chat text, you'll be prompted to add a link to your customer service at the base of this page.
The customer service link consists of two text input fields, both of which you will need to fill in to set up a customer service redirect.
- The URL where you would like customer service queries to be redirected.
- The text that you would like to use to indicate to shoppers that this is where they go for customer service-based queries.
Shoppers who click on the link in On-site Chat will be automatically redirected in their browser so that they can speak to your support teams through your customer service solution.
We highly recommend you link to your customer services page and use on-brand copy. This will help ensure that your shoppers' queries are answered quickly and correctly by support while your product experts can focus on sales-related chats.
Customize text
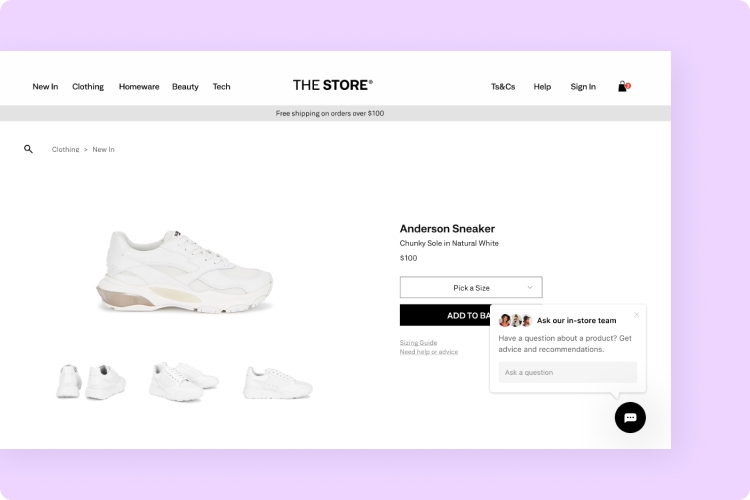
Customizing shopper-facing text in On-site Chat 🔤
In the Customize Text tab under the On-Site Chat Settings, you can customize the strings that appear in On-site Chat, including terms to describe your store teams, first messages, and links to customer service.
Here you can select whether to use all default text or add custom text to provide a more branded Bambuser Chat experience.
Default text
Once you have completed the retailer creation flow, On-site Chat will automatically begin using default text. This is the standard and recommended Bambuser Chat copy.
Custom text
If you choose to customize the text, you will need to update the custom text for each language you have set the plugin to use. Settings will pull in the languages you enabled in Supported Languages. If no additional languages have been added, the default language will be English.
Custom text may not appear straight away in the On-site Chat plugin unless you clear your browser's cache.
Here is a full list of text that you can customize, along with character limits for each string:
Term
Custom Text
Example
Character Limit
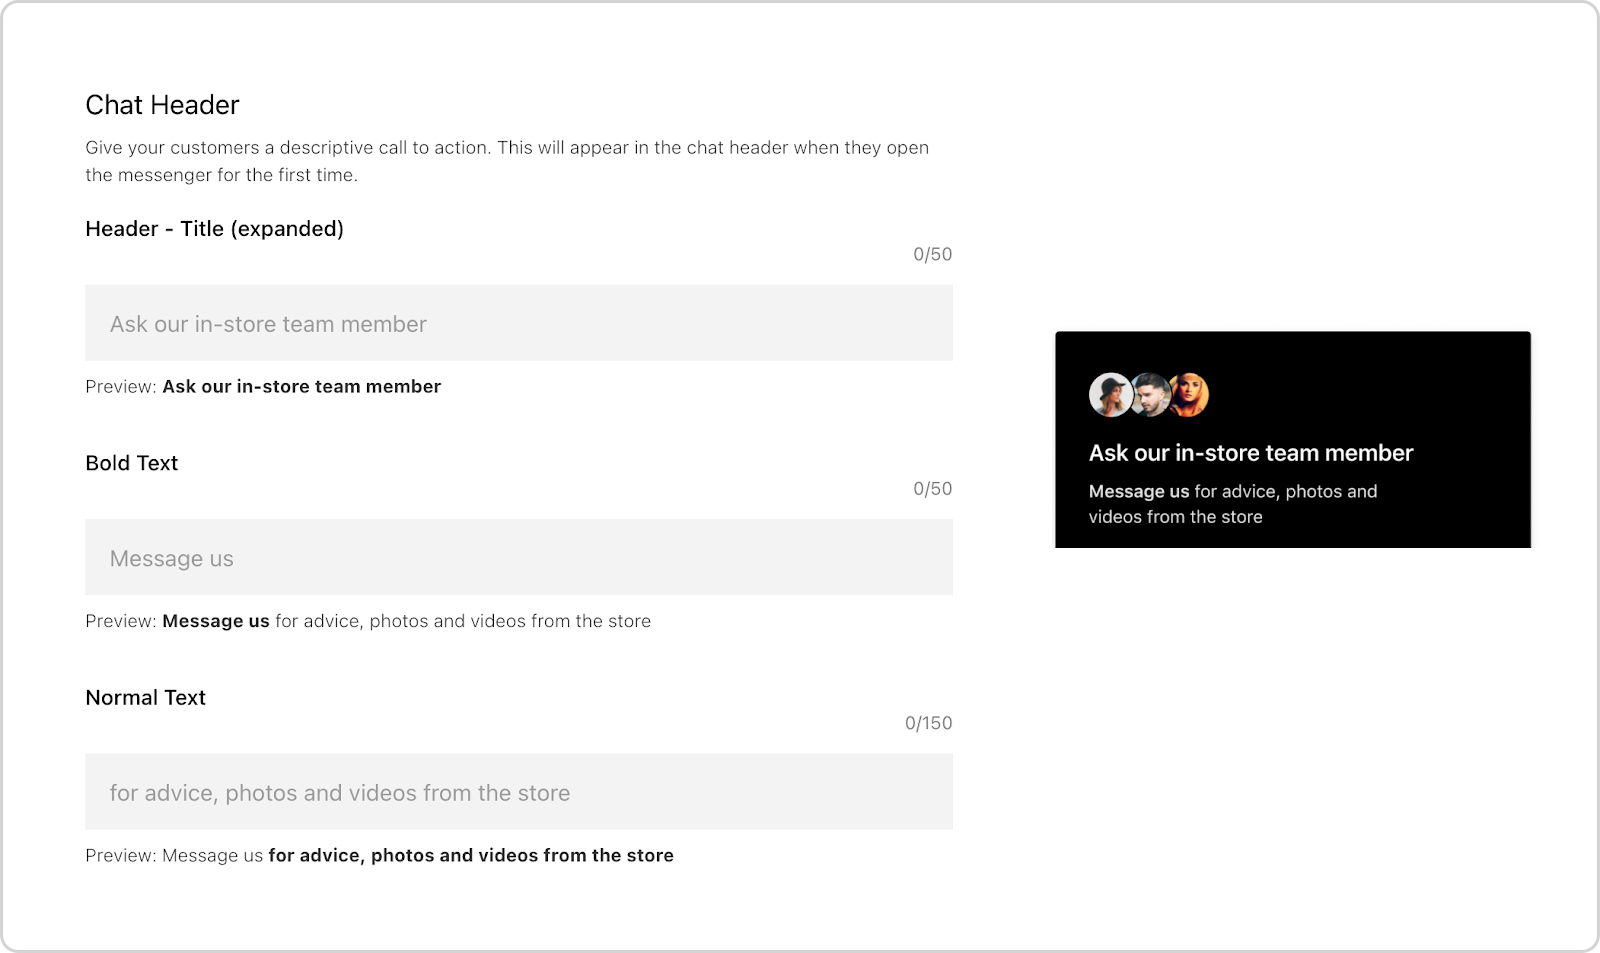
Header - title (expanded)
header.title
Ask our in-store team
50
Header - body bold
header.introduction.askStrong
Message us
50
Header - body normal
header.introduction.askNormal
For advice, photos and videos from the store
150
Welcome message (available)
message.initial.starter.available.multiple and message.initial.starter.available.single
How can we help?
40
Welcome message (busy)
message.initial.starter.busy.multiple and message.initial.starter.busy.single
How can we help? Our team is busy in-store right now, but they'll get back to you if you leave a message
170
Welcome message (closed)
message.initial.starter.closed.multiple and message.initial.starter.closed.single
How can we help? The store is closed right now, but they'll get back to you if you leave a message
170
Customer Services link
linkText.customerService
Looking for customer services?
70
Once complete, you will need to save any new changes.
👉Any fields left blank will revert to the default copy.
It is not possible to add line breaks in your customized text, as this can break the layout of the On-site Chat.
It is also not possible to customize or change the font, size, color, weight, and style.
Manage where On-site Chat displays
What is "Manage Display"?
Manage Display is a feature within the Bam Hub that allows you and your team to easily configure where and when Bambuser Chat On-site Chat appears on your website. You can also see at-a-glance where Bambuser Chat is currently appearing in your website.
Within the Manage Display feature, you and your team have the option to use our “simple mode”, for team members of any technical ability to configure how Bambuser Chat appears, or “advanced mode”, for technical teams that want to apply more complex rules for how Bambuser Chat displays.
Advanced mode and simple mode for your display settings cannot be used together. Using simple mode will override your advanced mode settings, and vice versa.
Getting started configuring your display settings
During your launch you will be provided with a Google Sheet for you to add your preferred rules.
When first implementing On-site Chat, the Javascript code snippet must be added to every page of your website including the checkout confirmation page, apart from sensitive checkout pages which are optional. This is important so that chats can follow shoppers from page to page and sales are tracked correctly.
While Bambuser Chat can apply rules to 90,000 URLs via Advanced Mode, we do not recommend supplying long lists of URLs because this can impact how quickly the chat loads.
Please note without either any display rules in place, the On-site Chat icon will display everywhere on the website where the tag is deployed.
When will I need to use this feature?
You will need to use this feature any time you want to adjust on which pages the On-site Chat displays. This could be during the launch of a new product, when running tests on your home page, and more.
Learn more about Manage Display
Check out the following pages for in-depth details on how to use each of the different modes to manage where On-site Chat displays on your site:
Using Simple ModeDeveloper Docs
Using Advanced ModeDeveloper Docs
Store App overview
Configuring the Store App 📱
Under Mobile Settings, you can change how store teams experience the Store App. Jump in to learn about each setting:
Employee ID
Saved Replies
Simultaneous Chat
Employee ID
Setting Employee IDs input during sign up 🏷️
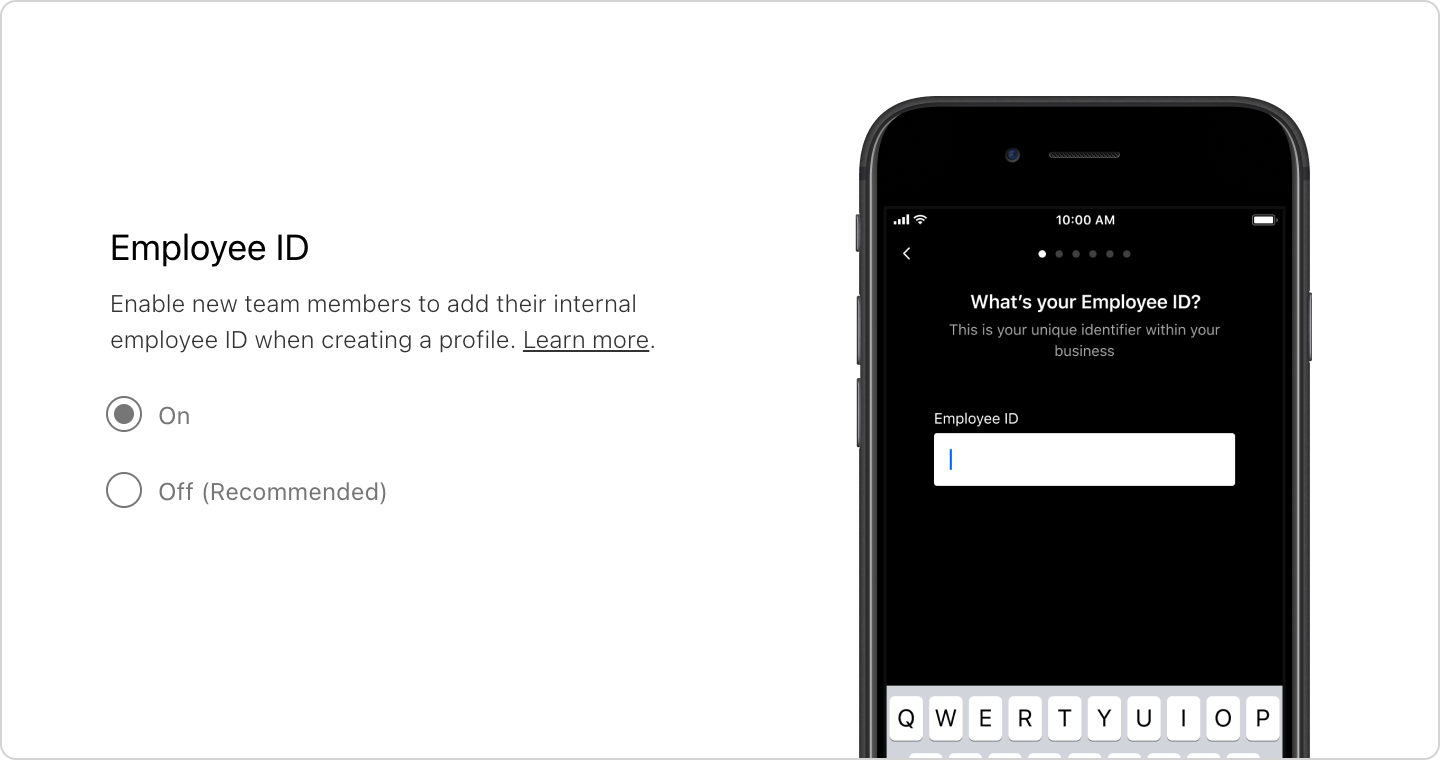
Here, you can choose whether you want your team members to input their Employee ID number when registering on the Store App.
They'll be prompted to input their ID as part of the onboarding flow, and their account and performance will be tracked against this ID for the duration of time that they use the Store App.
In most cases, we recommend switching off the Employee ID configuration, unless needed in a specific circumstance.
To learn more about this setting please contact your Customer Success Manager.
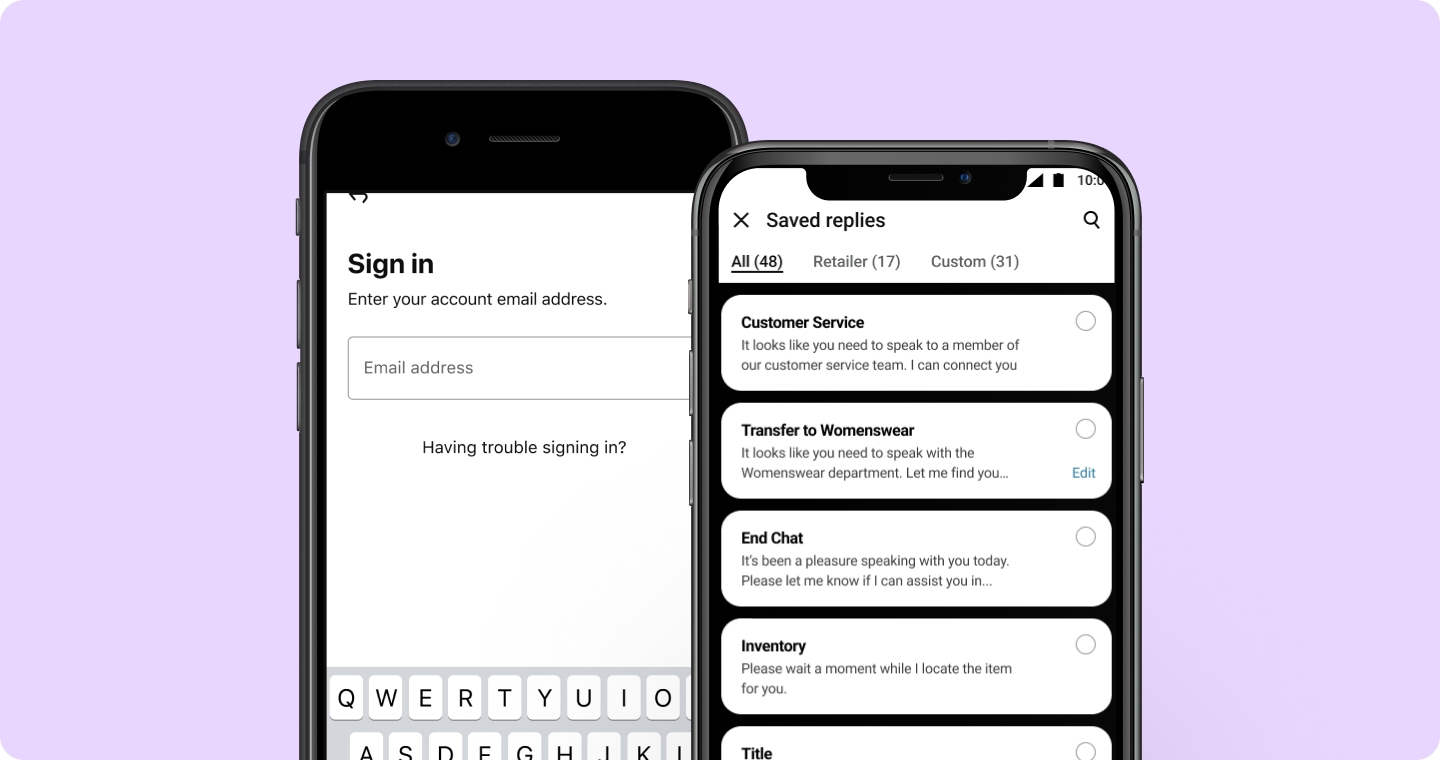
Saved Replies
How to add new Saved Replies 💾
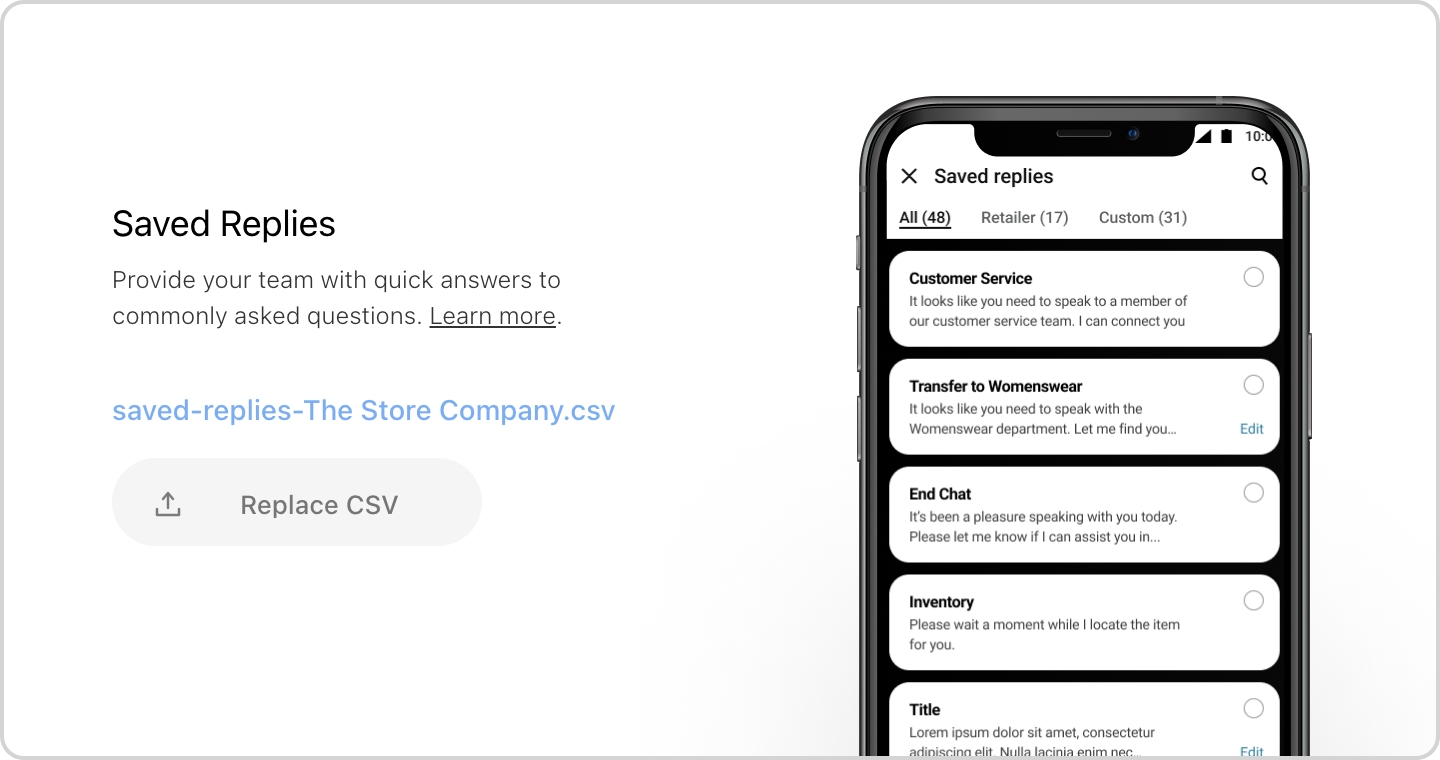
Add Saved Replies for your store teams to use in the Store App. These are pre-written replies that can address frequently asked questions from shoppers in a complete and on-brand way.
Changing any Saved Replies will apply across all departments, and overwrites any current saved replies.
To add a new Saved Reply:
- Open the Saved Replies file you intend to upload in Excel.
- Confirm the file does not have any extra headers, all headers are correctly formatted, no extra lines are included and that no titles are duplicated.
- Save the file as a CSV
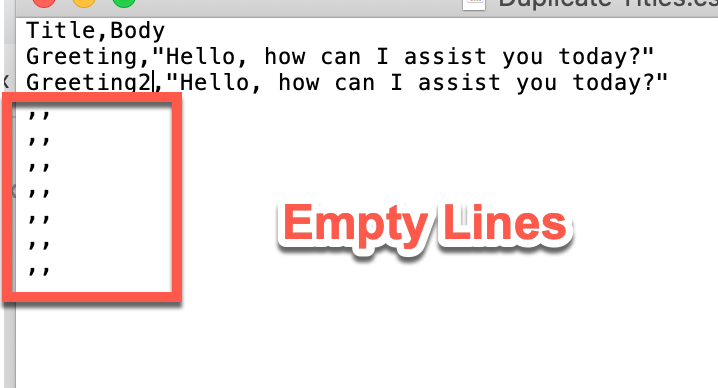
- To double-check check the file is correct, you can open it in TextEdit to make sure there are no empty lines. If there are, simply delete them, and save.
- Go to the Mobile Configurations for your chosen retailer.
- Click Upload CSV and select your file.
- Save Changes
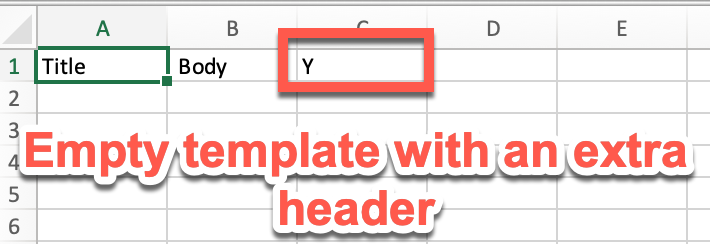
Saved Replies must be uploaded in the correct format:
- CSV file
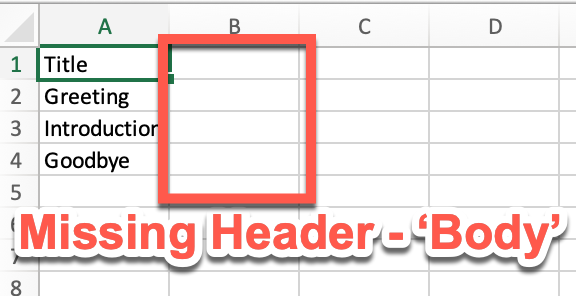
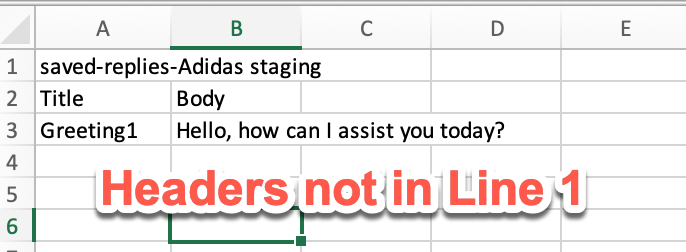
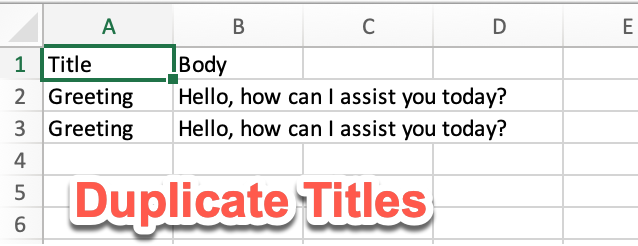
- Headers in line 1: ONLY Title, Body
- No empty lines
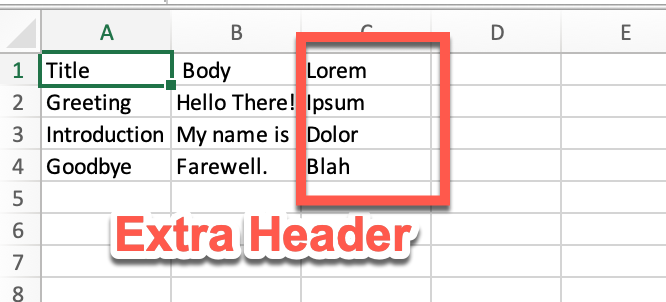
- No extra columns
- No duplicated titles
If you're editing the document in Notepad or TextEdit, make sure that any entries with commas are wrapped in quotation marks, e.g.: Greeting, "Hello, how can I assist you today?"

Example good file:
Good Saved Reply Template
Common errors in files:
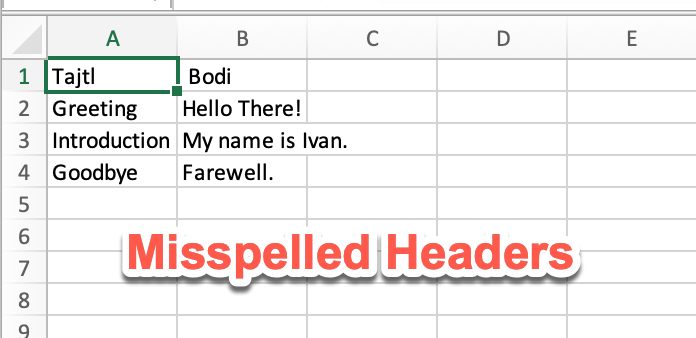

Wrap the body in quotes if it contains a comma
When copying text from another program such as PowerPoint, odd characters can come through. It's important to check the replies in the preview before saving.
Personalized Saved Replies
Product experts using the Store App are also able to add their own personal Saved Replies, for example, a response to a question in their own voice. They can do this directly in the Store App, and these Saved Replies are only accessible by them, i.e. they're not added to the team's base of all Saved Replies.
Simultaneous Chat
It's possible for store teams to be in more than one active chat at a time. Learn more about Simultaneous Chat:
How Simultaneous Chat works
Frequently asked questions
How Simultaneous Chat works
Service more shoppers simultaneously.
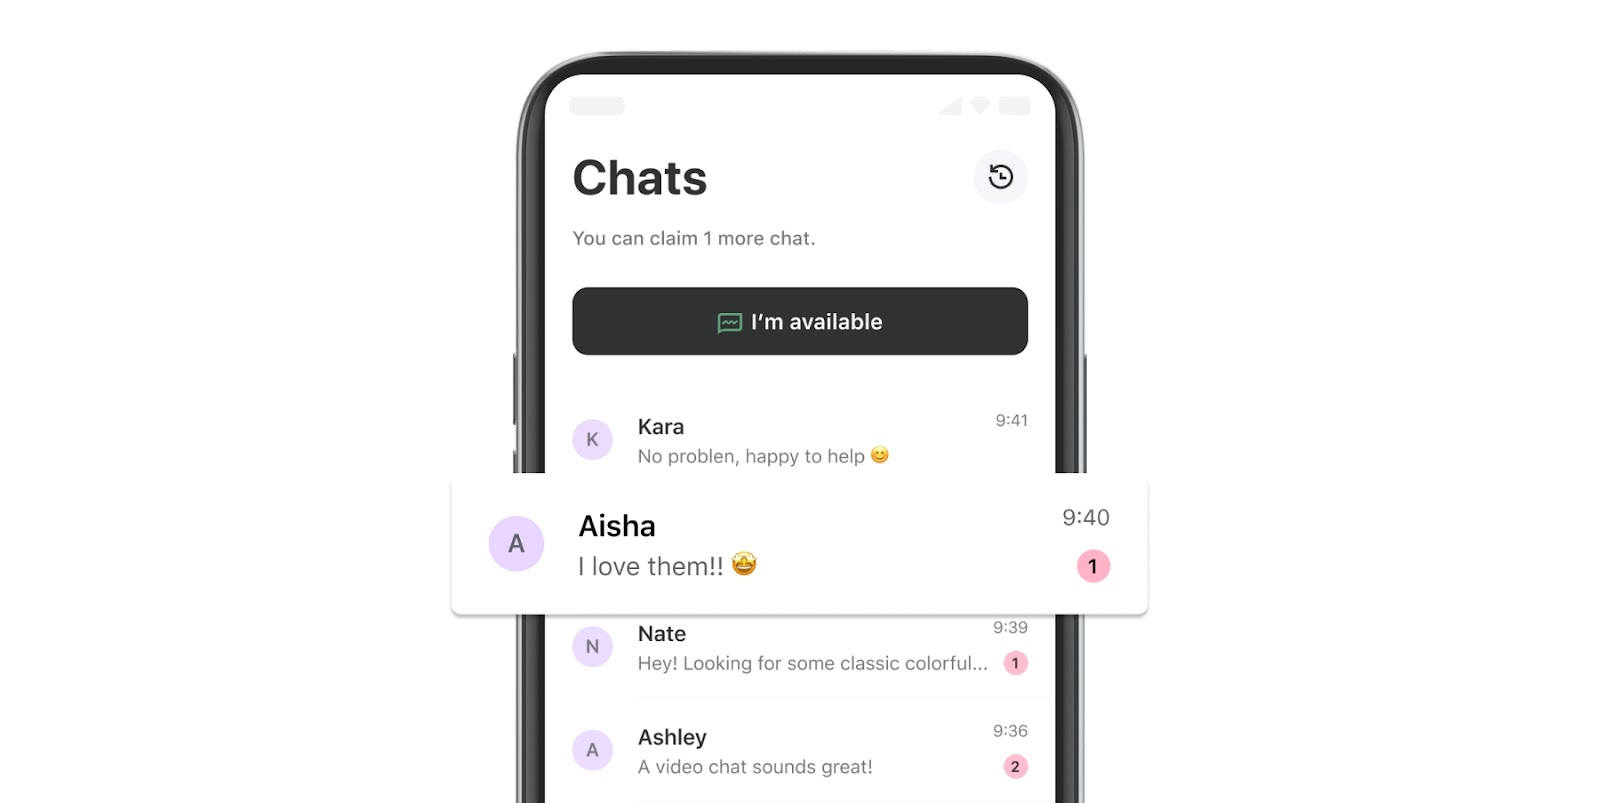
Simultaneous Chat unlocks the opportunity for product experts to service more shoppers simultaneously.
Better coverage and fewer missed chats mean opening the chance to service more customers and, ultimately drive more sales.
In a nutshell, this means:
✅ Fewer missed sales opportunities.
✅ Boosted product expert efficiency.
✅ Service more shoppers with fewer staff.
Simultaneous Chat is the new default chat experience for product experts, but you can change the maximum number of chats (3 is the default).
Just go to the Store App Settings section in the Bam Hub.
Frequently asked questions
Can simultaneous chat be switched off?
In short, no. However, all merchants can decide the maximum number of chats their experts can have. That means you can select a maximum number of 1 chat, and maintain a 1:1 connection between one expert and one shopper.
What maximum number of simultaneous chats is the default, and why?
The default max number of chats is 3 but the maximum of 20. Based on our learnings during the beta, this is the sweet spot for most merchants. They benefit from increased chat coverage without becoming stressful for experts.
What should experts do if the max chat number is too high to cope with?
The max chat number is only ever the max potential number. Suppose you, for example, have 2 chats that take lots of focus and time. In that case, experts can set themselves to unavailable and only receive further chats once they are ready for more.
What number of chats should we set as the maximum?
The answer to this depends on several factors, including chat demand and team size. So far, in the beta, we have seen a sweet spot of 3-5 chats. But this is something your team will need to experiment with.
How do we change the maximum number of chats?
Go to the Bambuser Chat Store App settings section in the Bam Hub. The default is set to a maximum of 3 chats. The maximum number will be 20. The minimum number is 1.
Manage Stores Index
Easily update and Manage Store Settings 🛍
The Manage Stores Index lets Store Managers and Head Office users see the basic details and status of their stores in one location. This page is also the starting point for creating new store locations on Bambuser Chat, and for editing any existing store locations.
Here, you can see each of your stores, complete with basic information including stores' current status (open or closed), the timezone they're in, and the latitude and longitude of their physical location.
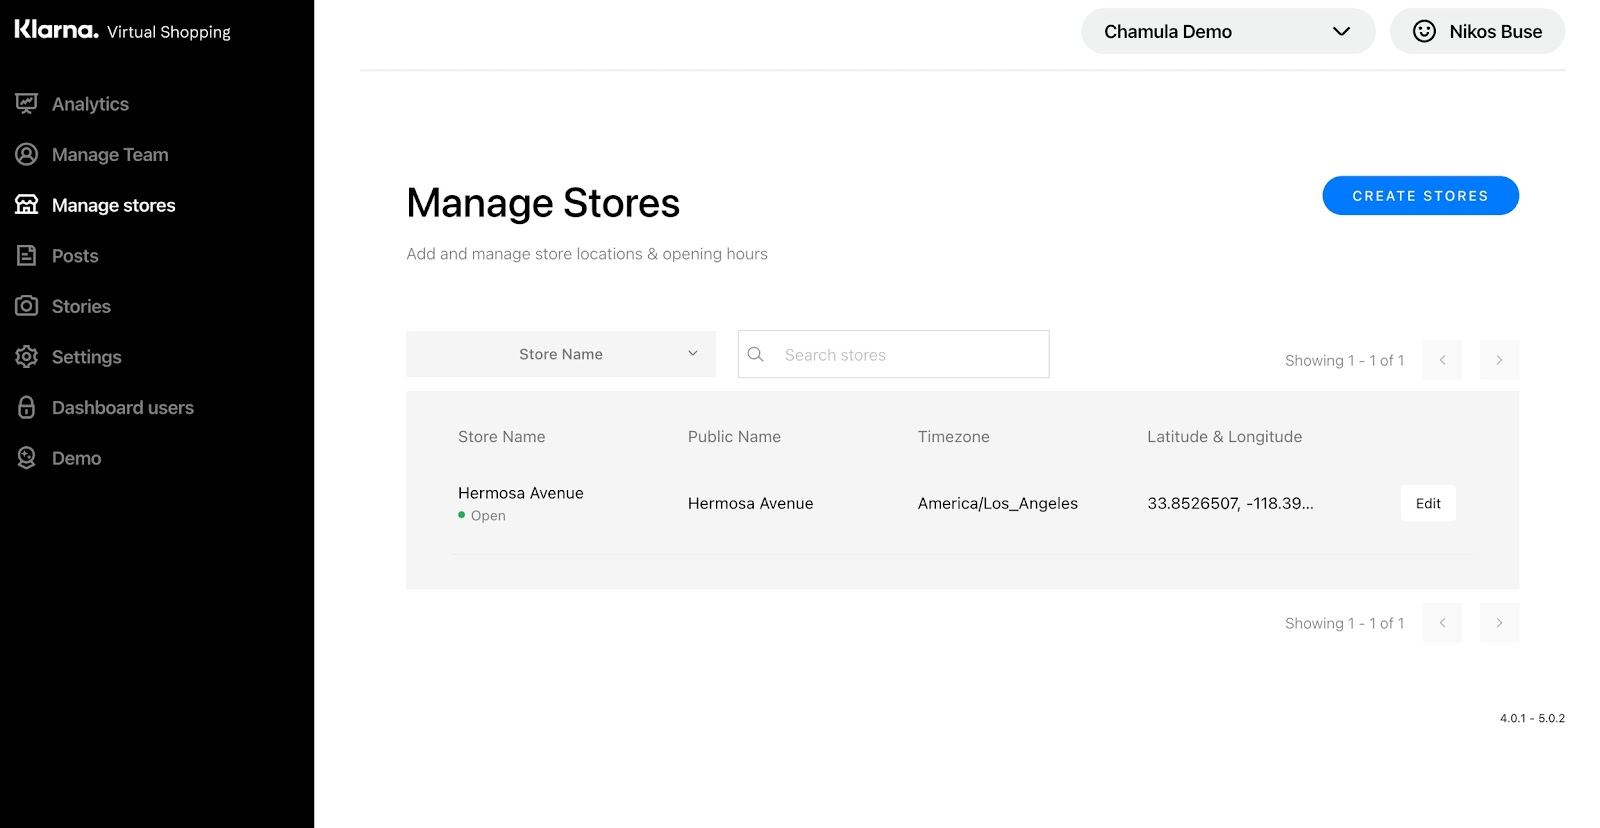
To quickly see a store's opening hours, you can hover over the current status under the store name.
The tool will only work for users with the right level of access permissions. Currently, all users with Manage Team permissions also have access to Manage Stores.
To request changes to permissions for the Bam Hub users, contact your Bambuser Chat account manager.
Manage Stores Index FAQ
What’s the difference between store name and public name?
The public name is the name that customers will see for your store. “Store Name” or “Internal Name” is the name that your in-store experts will see when they see store details in the app.
How quickly do updates to store settings updates go live?
Store settings updates should be present within the Store App and On-site Chat within 5 minutes of changing the settings in the Bam Hub.
Who can use this feature?
This feature will initially be made available to all users with Manage Team permissions. Any other individual with the Bam Hub access can be given Manage Stores if requested.
Can I add new user permissions?
To have new Manage Stores users added to your account, please speak with Support or your PST.
I am unfamiliar with these time zones. How do I find the right timezone for each store?
When creating a store, your store’s timezone will be applied automatically. You simply need to enter your store’s address on the Create Store page, and then select the matching address that appears in the dropdown below. Once that’s done, your timezone will be set based on the Google Places API.
Account overview
Configuring your Bambuser Chat account 🏢

From Account Settings, you can make changes to your product feed, team and store set-up, and more:
Product Feed
Currency
Time zone
Team availability
Out of operating hours
Left Message SMS sender ID
Left Message expired URL
Department settings
Adding a new department
Product Feed
Empowering product recommendations 👕
The Product Feed makes it possible for your team to share product recommendations with shoppers.
We’ll walk you through each step to set up your Product Feed.
The tool will only work if your Product Feed meets the following criteria:
- CSV-format(comma-separated, tab-separated, or pipe-separated values format)
- Hosted on a publicly-available URL
- Include all required fields
If your Product Feed does not meet these criteria, get in touch with us. If you have already set up your Product Feed, you won’t need to use this tool.
How to set up your Product Feed
In just a few steps, you can ensure that your feed is being indexed and updated on a regular basis, using whatever schedule works best for you.
To index your Product Feed, you will need access to the Bam Hub Settings. If you do not have access, get in touch with your account manager to request access.
Step 1. Initial setup 🏁
1. Go to Settings and click on the ‘Edit’ button. From there, select the Product Feed option in the Settings menu. Here, you will see an overview of the 3 steps to set up your feed. Now you can move into the setup flow.
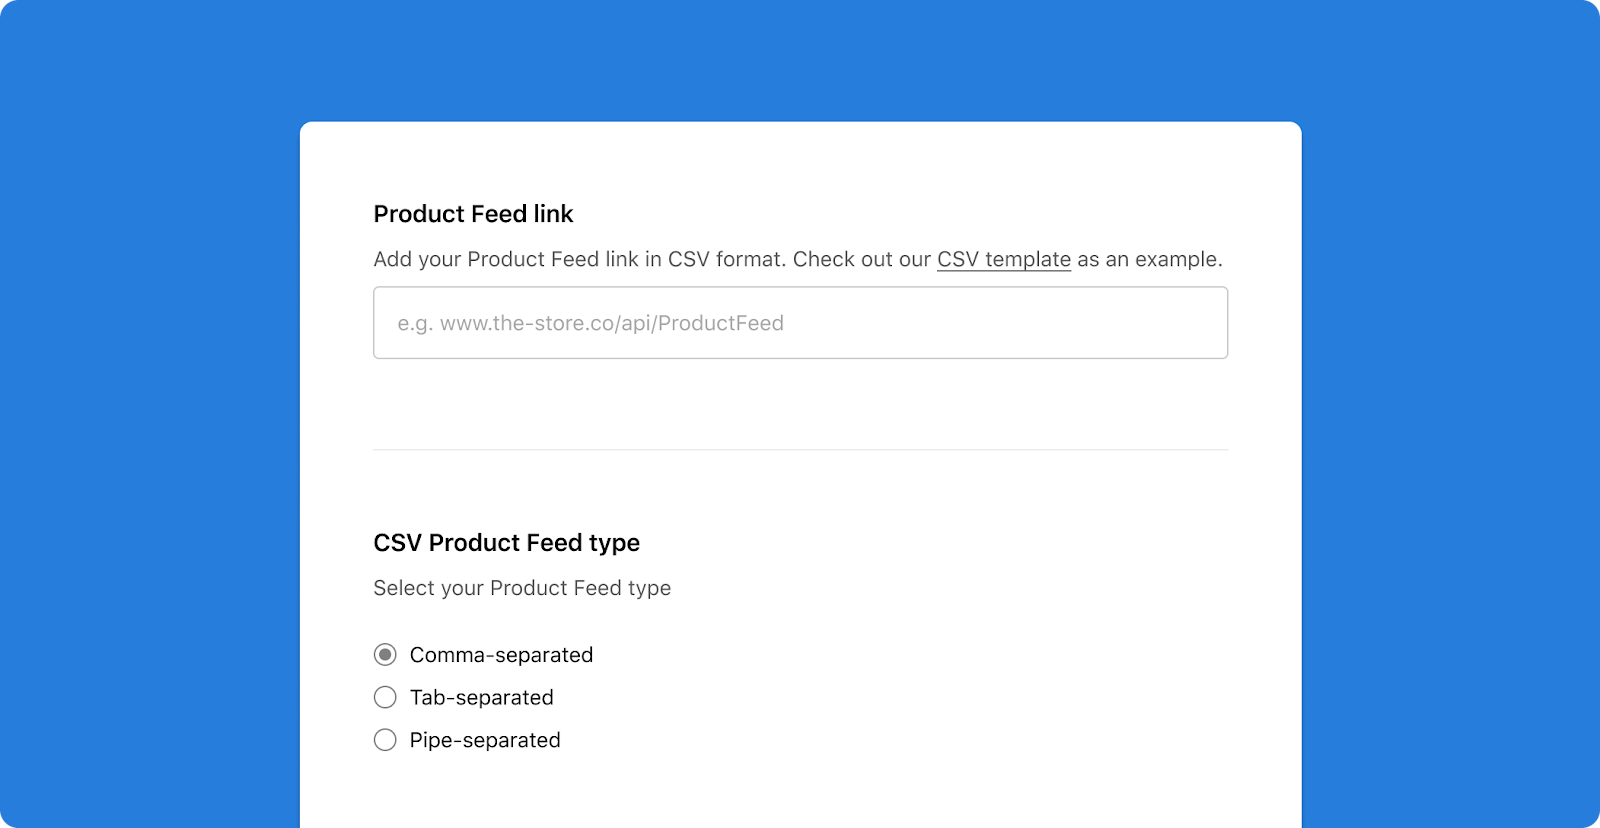
2. Add the URL for your Product Feed and choose whether it is organized in a comma-separated, tab-separated, or pipe-separated format.
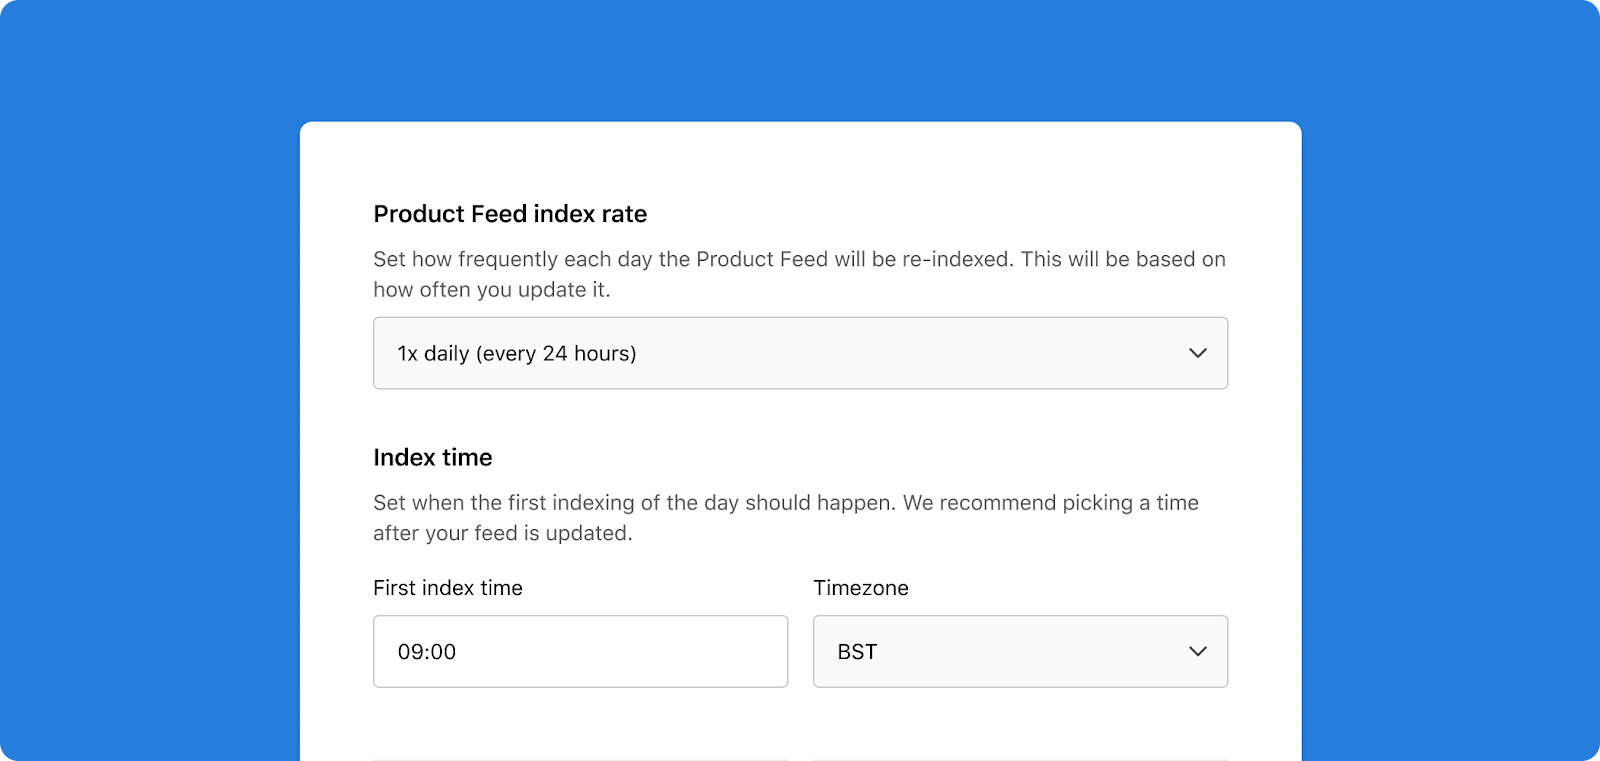
3. Choose how often Bambuser Chat tries to update the Product Feed to the Store App. The frequency should align with how often you update or change your Product Feed so that what product experts and shoppers see during a chat mirrors what appears on the website. You can select an index frequency between 1x and 4x per day and set the time at which they would like the first index.
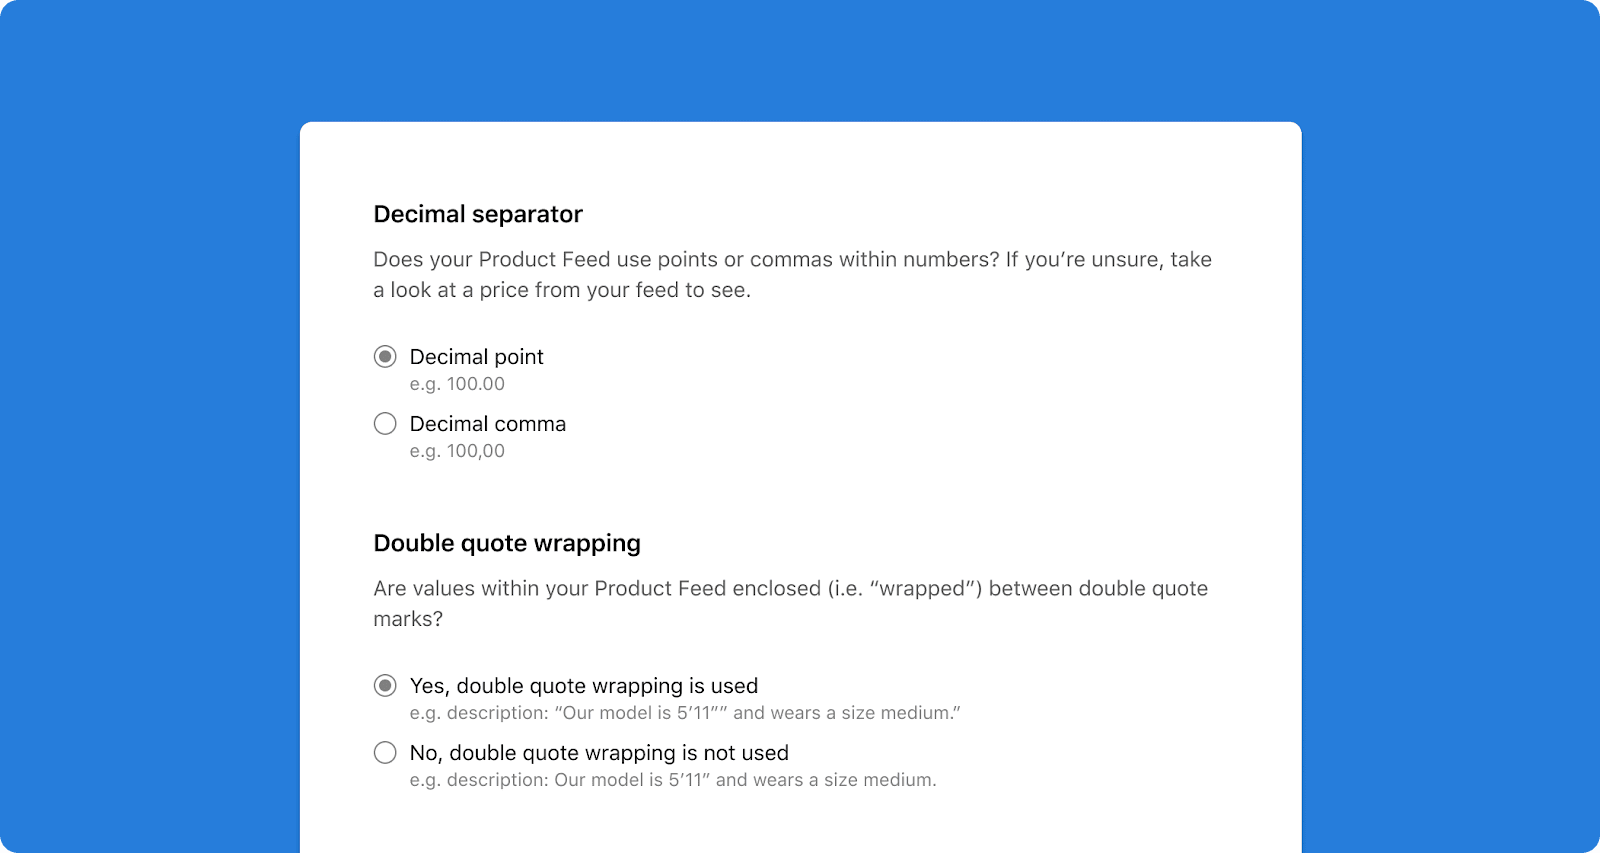
4. To ensure fields map correctly, choose whether your feed uses decimal points or decimal commas (i.e 100.00 or 100,00) for pricing or whether you use double quote wrapping (i.e “ or ‘) for item descriptions in the Product Feed.
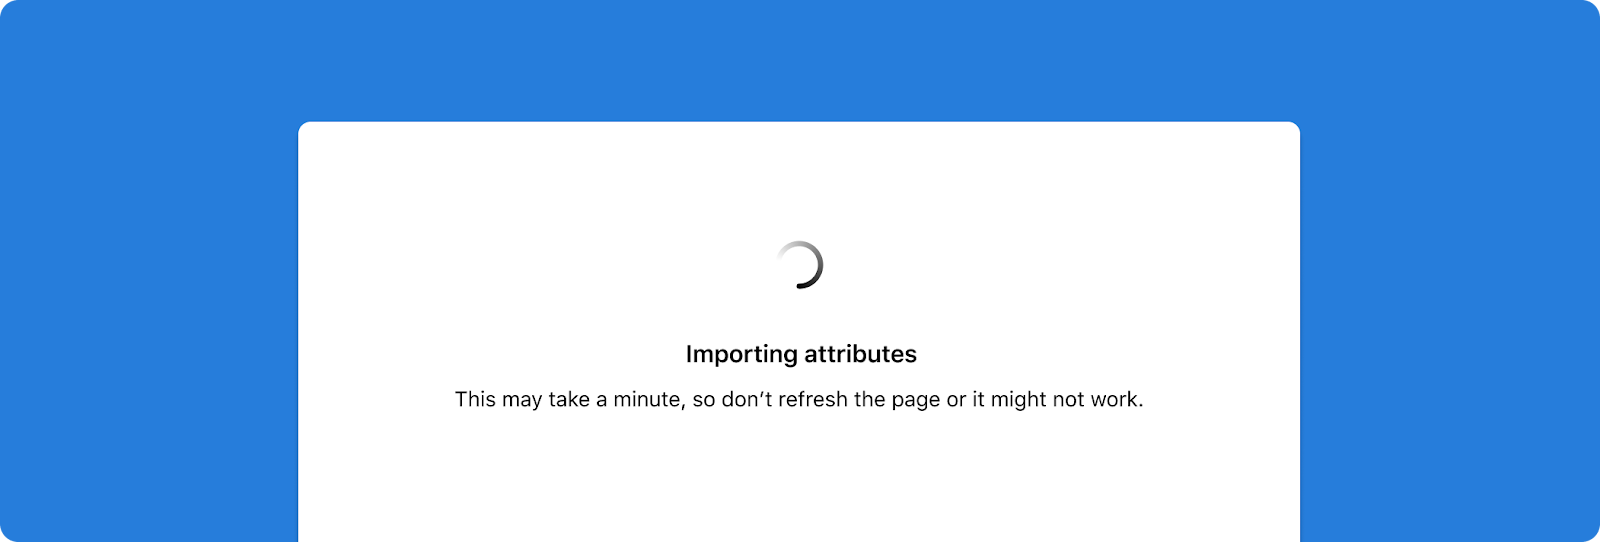
Initial setup is complete! You'll see a message that says: ‘Importing attributes’. If any of the information you input in step 1 needs to be changed, you'll be notified at this stage and pointed back to this first step to make adjustments.
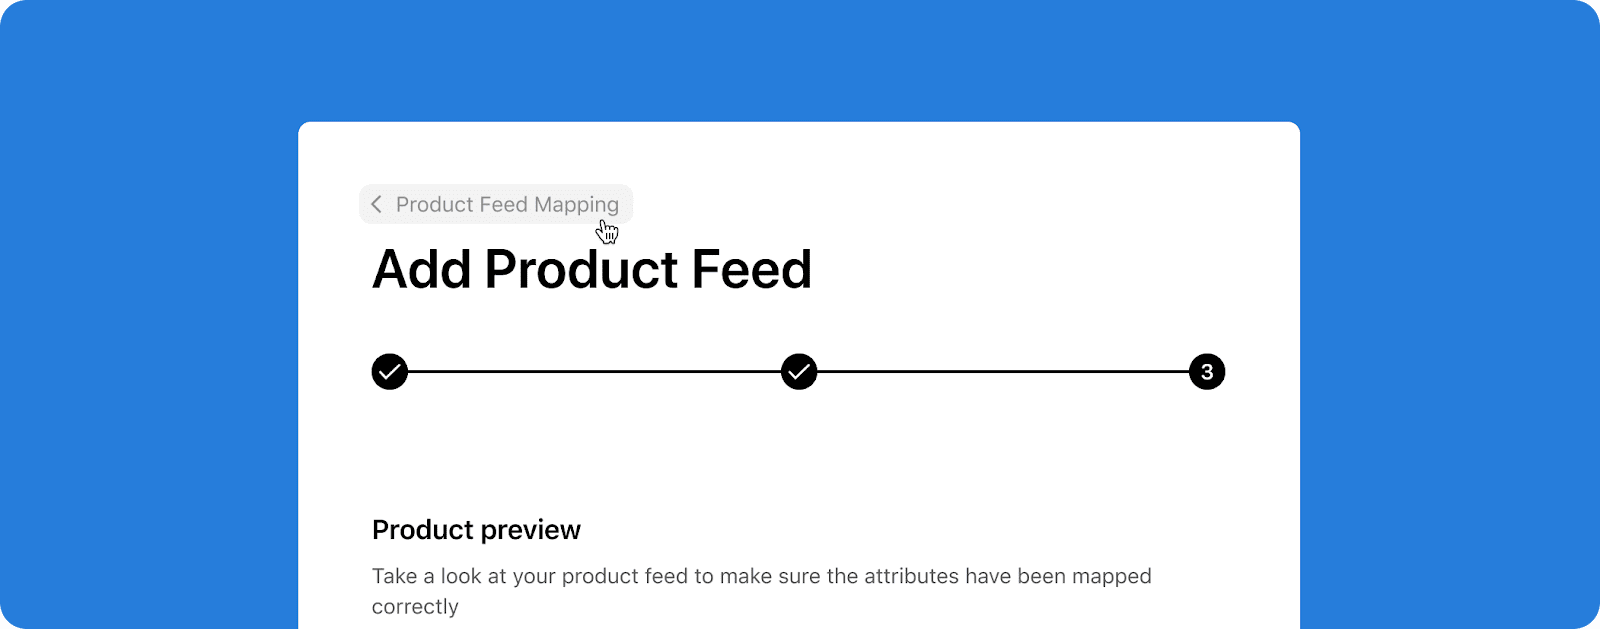
Step 2. Attribute mapping 🗺️
Now it’s time to match the attributes in your Product Feed to Bambuser Chat’s required and pre-defined attributes.
At this stage, you can set up Bambuser Chat to describe particular Product IDs or SKUs differently from the way they appear in your actual Product Feed. Having this flexibility should help you provide the best possible Product Feed experience for product experts – and prevent accidental or incorrect matches.
1. The tool will alert you about the number of attributes that were grabbed from your feed, all of which will be added to drop-downs on the page.
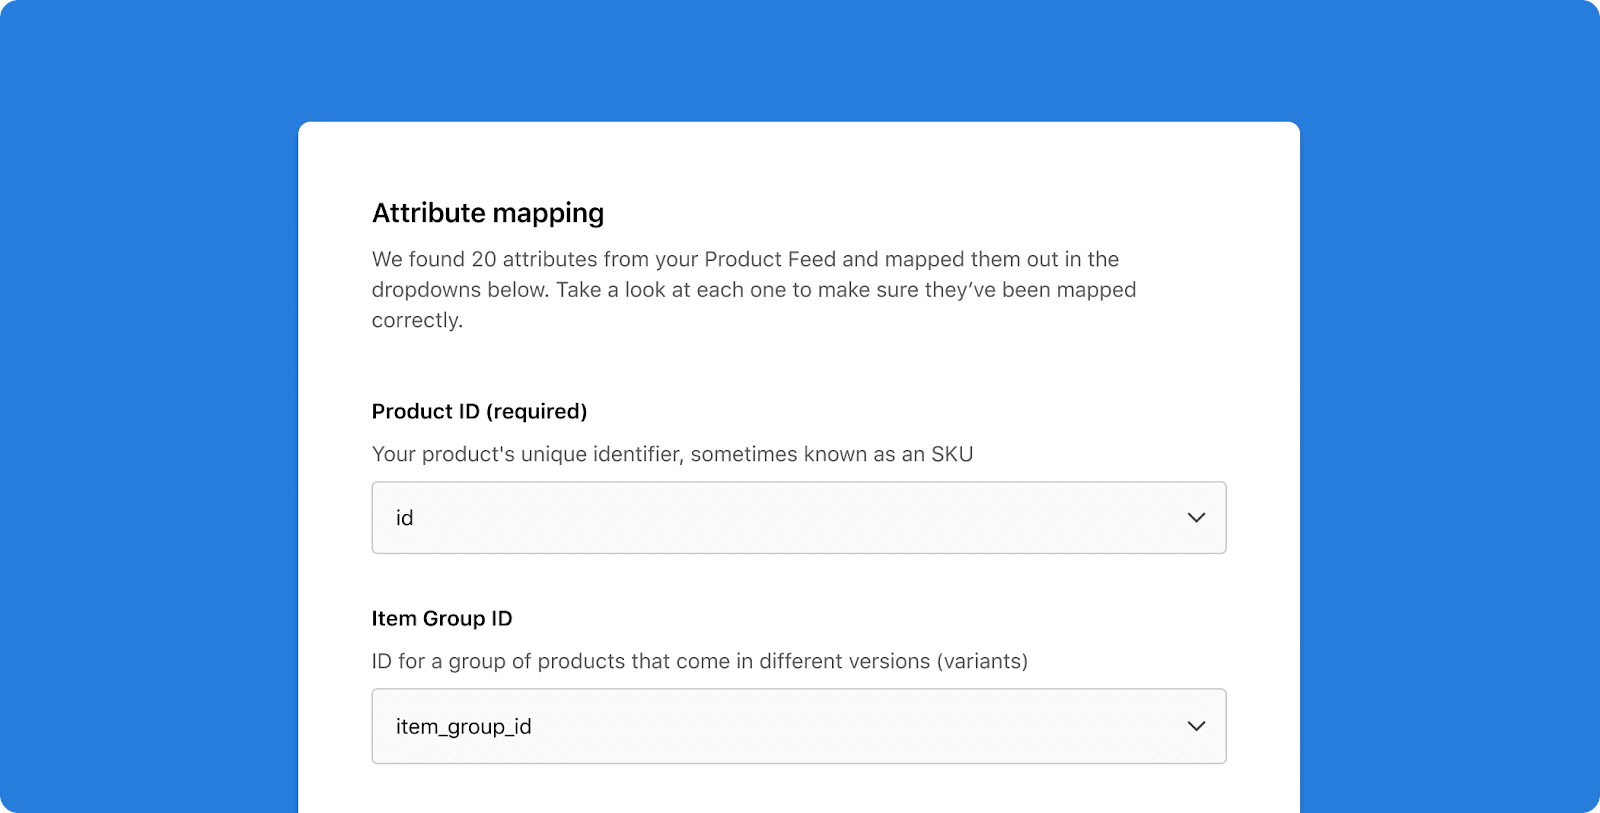
2. Review each attribute field, and select from the drop-down header from the feed that matches the Bambuser Chat attribute.
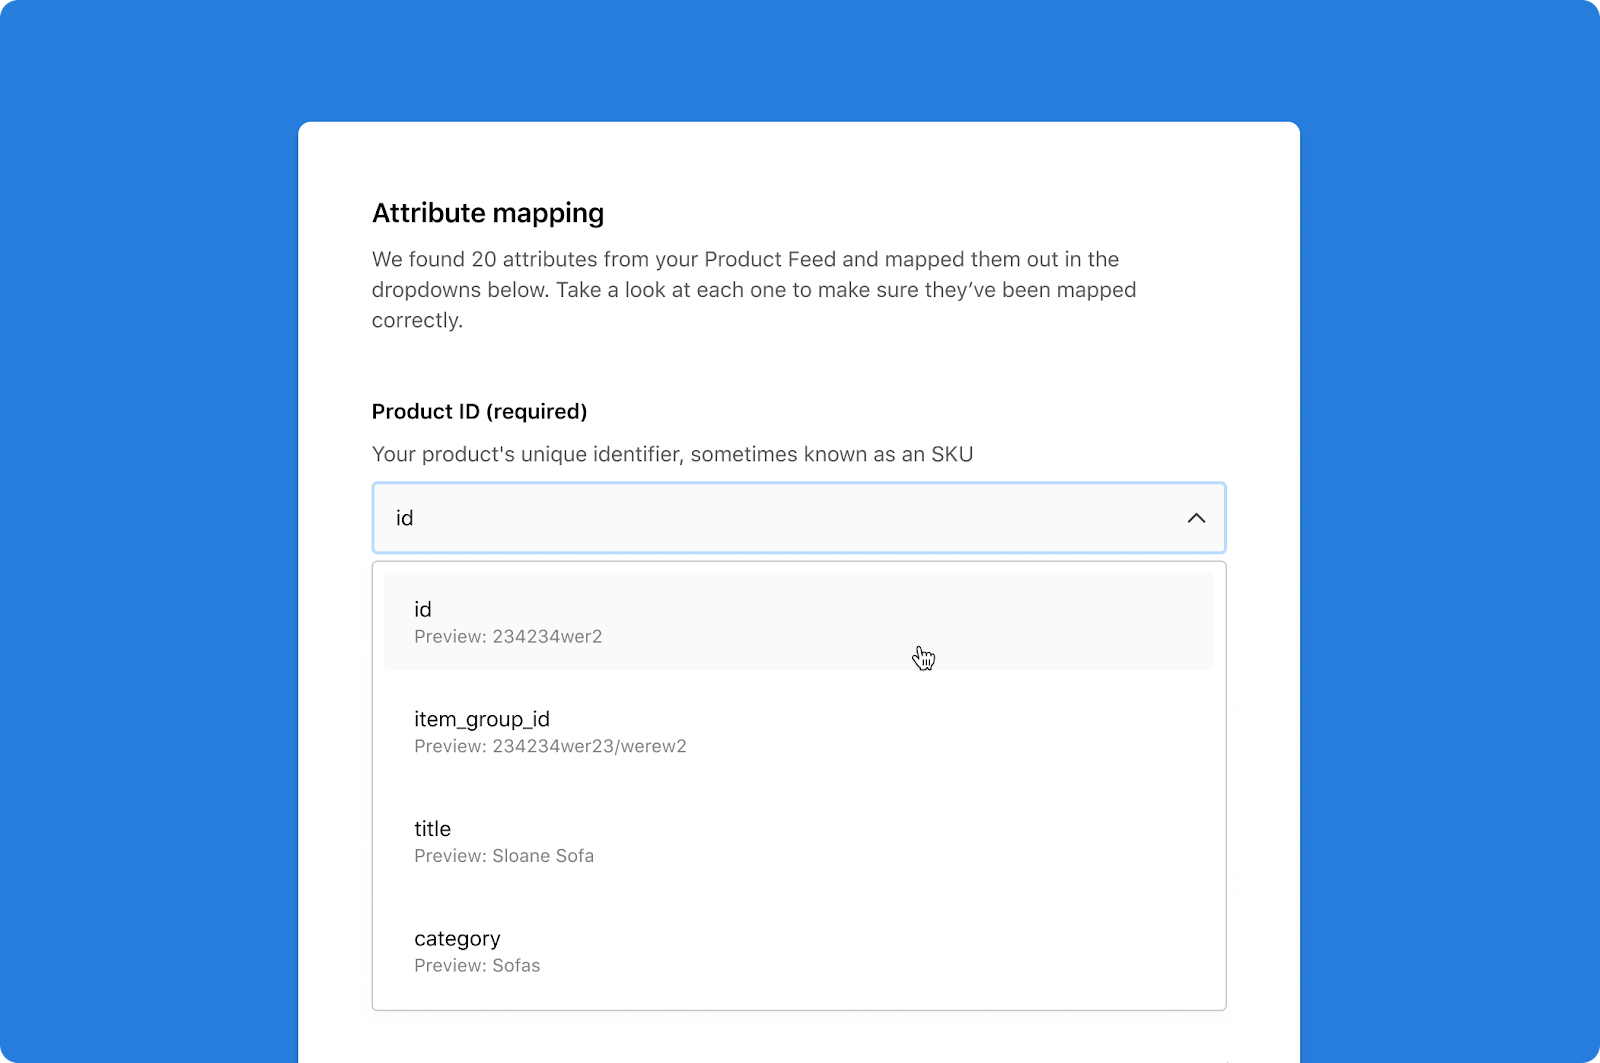
All headers from your Product Feed will appear in the drop downs so you can easily match headers to attributes.
Once an entry on the dropdown has been used, it cannot be reused for another field.
3. Enter a value for each field marked as ‘required’. You’ll need to enter values for each required field to proceed to the final setup step.
We recommend that you fill out all additional fields, if possible. The more information you can provide, the better the experience will be for product experts and shoppers.
Step 2 is complete! Now you can finish setup by previewing how your Product Feed will appear to product experts.
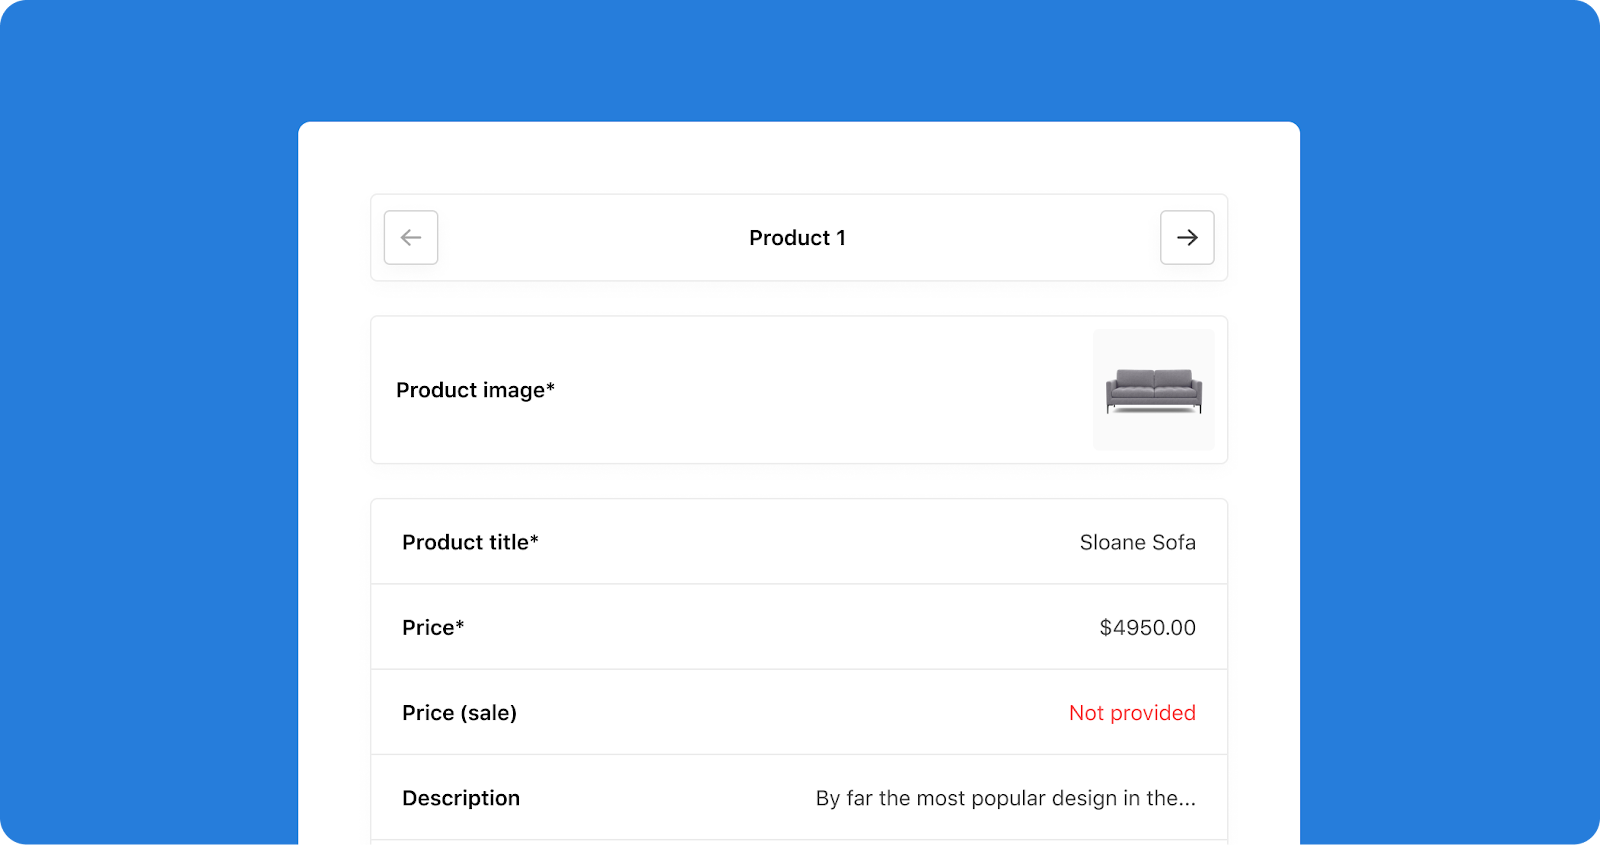
Step 3. Product preview 🔭
To finish, you can preview what the Product Feed experience will look like for product experts and shoppers. This makes it easy to see if you will need to change any of the field mappings you made in the previous step.
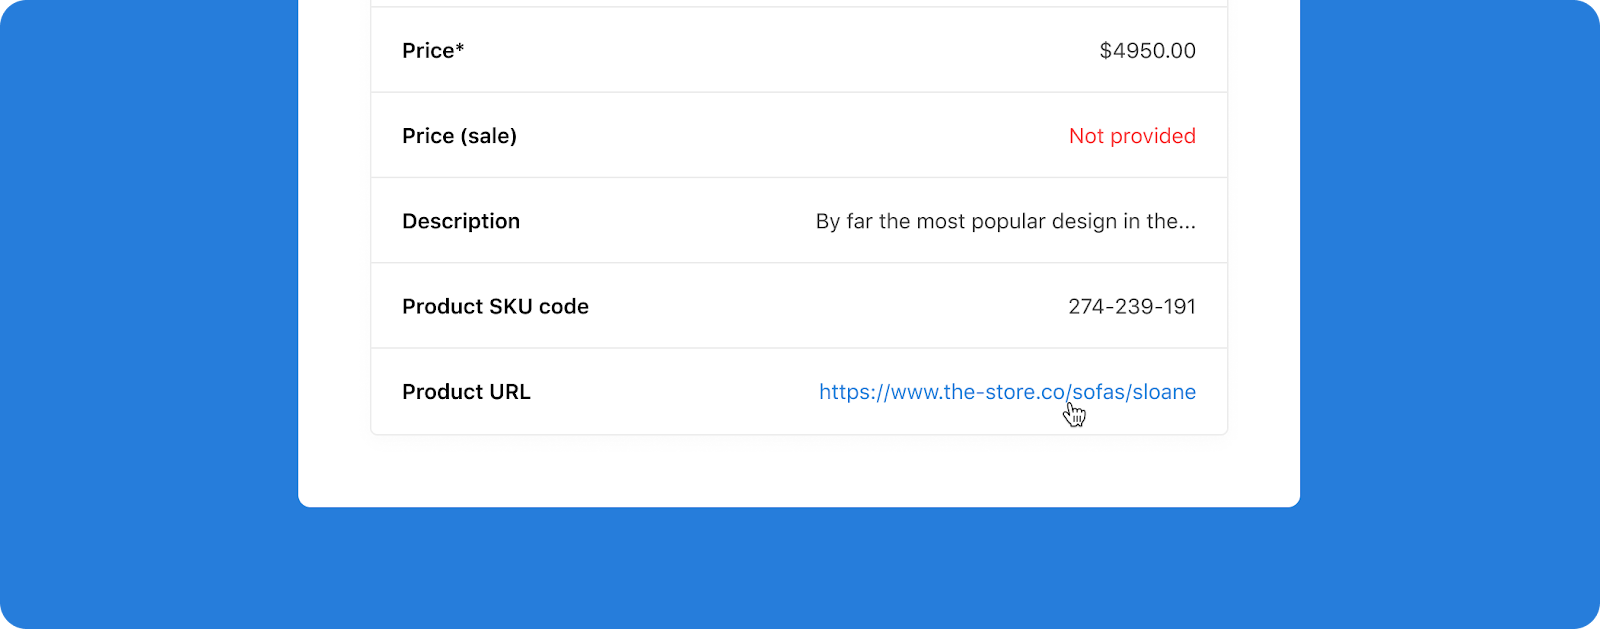
1. Review the first 9 products using the arrow buttons on the screen to confirm mappings are correct. For each product, you will want to confirm that the product title, price, description, SKU Code, and URL are all correct.
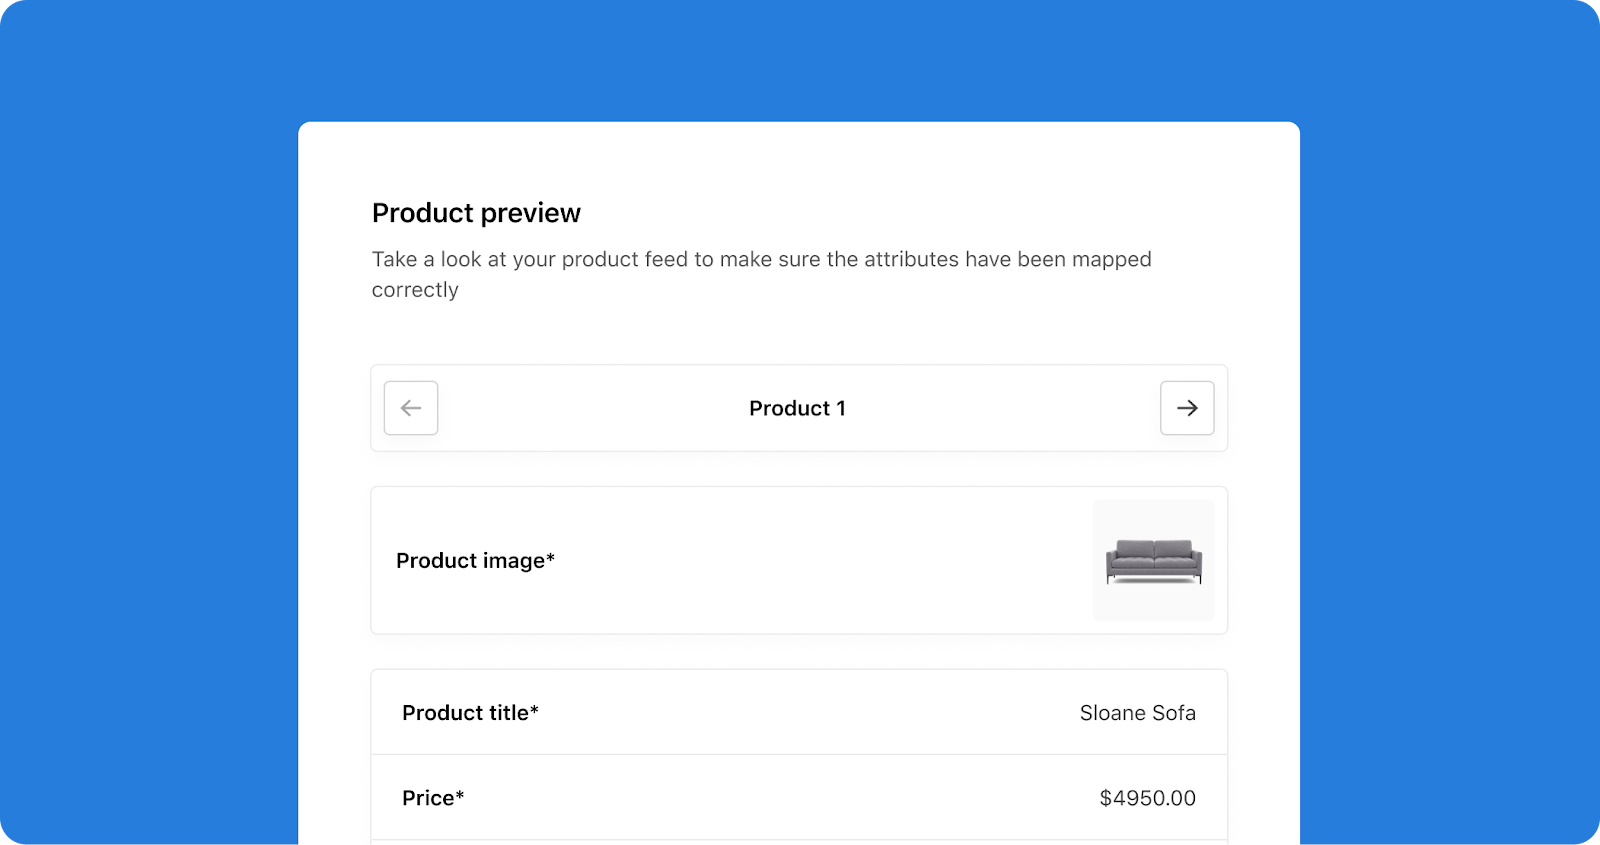
2. Now you can compare what the product preview is displaying against the information displayed on your website. Click on the product URL located at the bottom of the table and open the URL in a new tab, so you can compare.
3. If you need to make any changes, simply head back to Step 2 by tapping the back arrow on the top of the screen.
4. If all fields look correct, select ‘Finish’.
Super! Your Product Feed set-up is complete and its first indexing has begun. Once indexing is complete, you'll receive a confirmation email.
While the feed is indexing, you won’t be able to make any changes to mappings. If you need to make a change, you will be able to do so after receiving your email confirmation that indexing has finished.
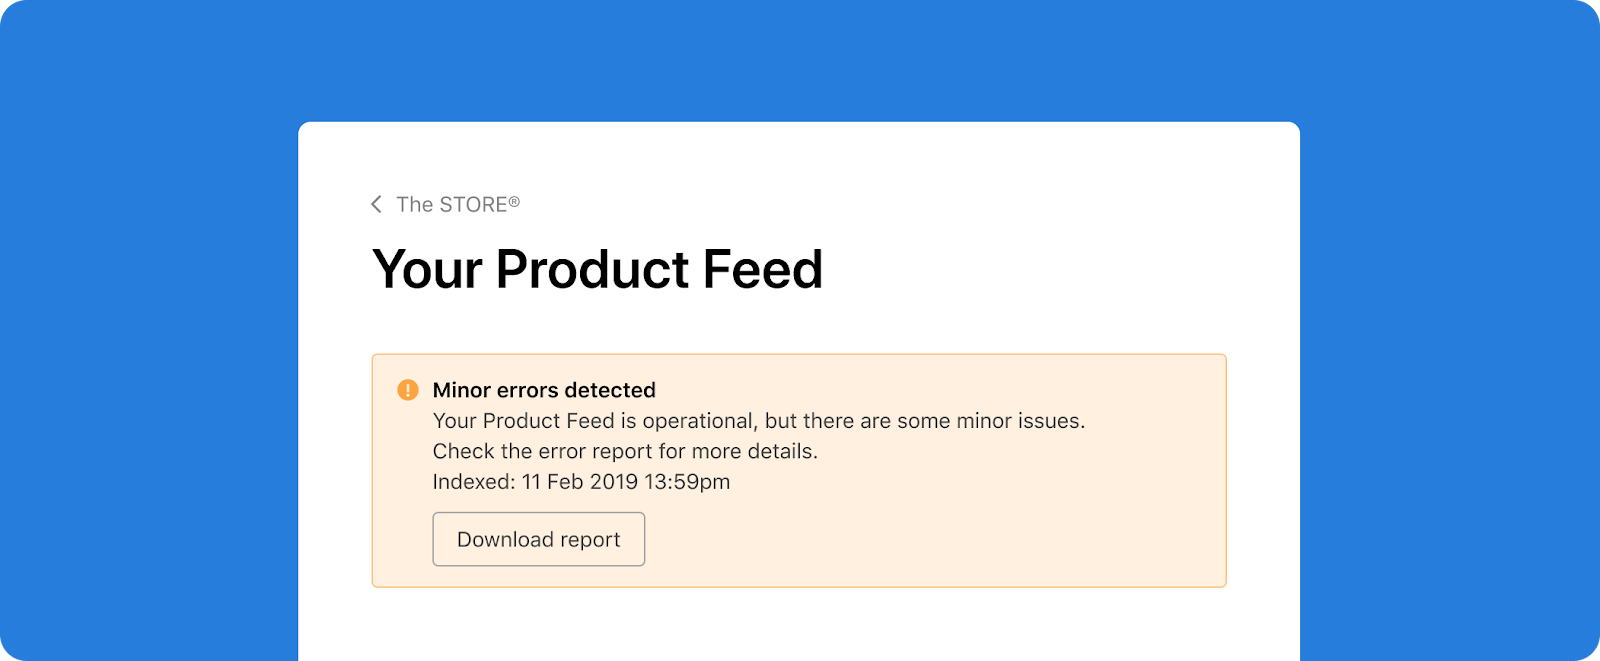
Managing your Product Feed and Solving Issues 💁
After initial setup, if there are issues with your Product Feed feed you will receive alerts on its status. These alerts are there to notify you of any issues so you can quickly take steps to fix them.
Setting Currency💲

The currency selector enables a user to determine which currency is used for reporting across Bambuser Chat, from the Bam Hub to the Store App.
Select the currency for the dashboard. Currencies are denoted by three-letter alpha-3 codes together with their currency symbol, e.g. USD, $.
We recommend you select the currency that reflects how your headquarters tracks sales. For global organizations, this will mean that Bambuser Chat reports are applicable to the widest range of geographies.
Time zone
Setting your time zone ⏲️
The Time Zone selector lets you set the time zone for your data reporting in the Bam Hub.
To set a time zone for reports, you should select a time zone from the dropdown on the Account Settings page. Time zones are listed in Internet Assigned Numbers Authority (IANA) or Time Zone Database format to ensure the best possible accuracy at all times. You can check for your time zone here.
We recommend you set the time zone that reflects the time zone of your headquarters. For global organizations, this will mean that Bambuser reports are applicable to the widest range of geographies.
Contacts
Giving your teams access to Contacts ✉️
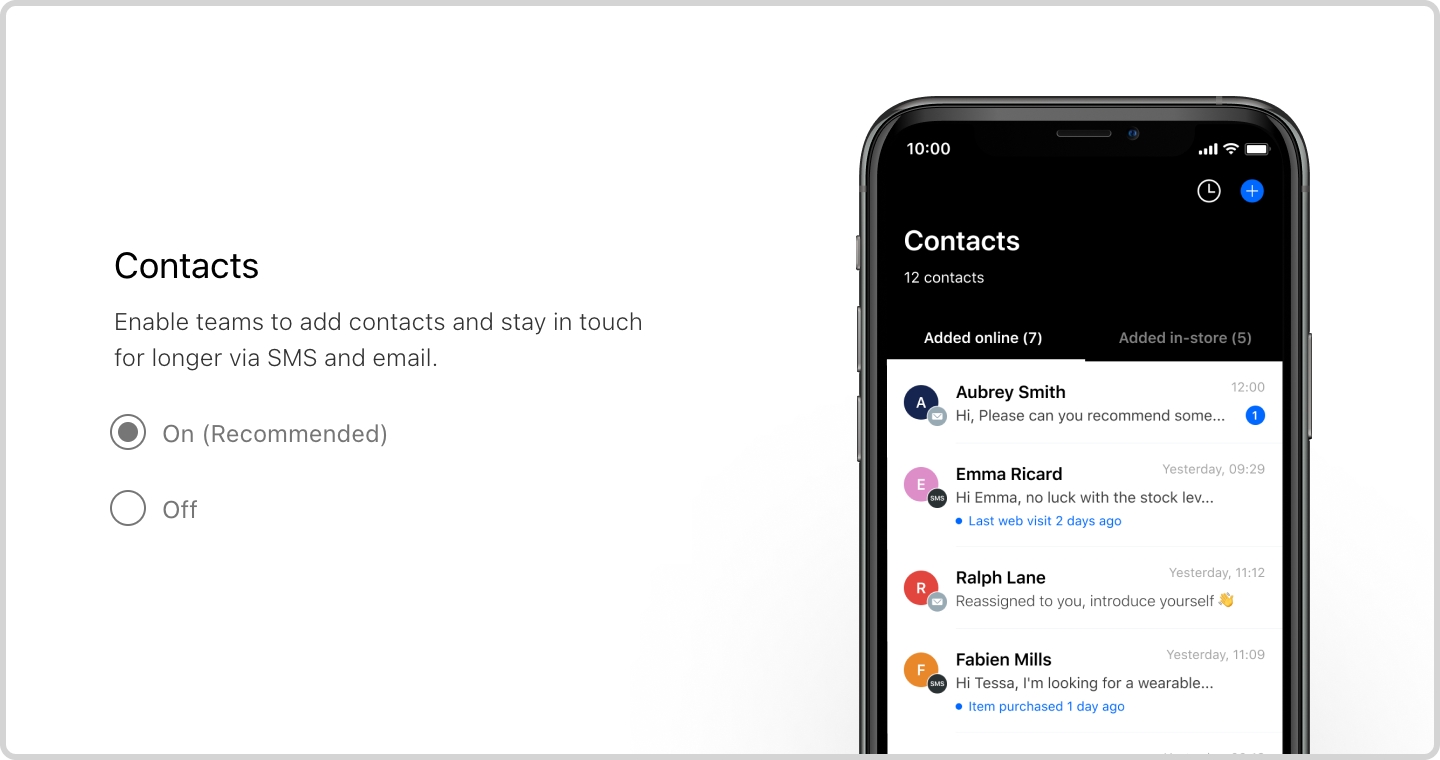
Contacts empowers your store teams to keep the conversation going over email, text, or WhatsApp to drive repeat sales.
With Contacts switched on, it will appear for all teams the next time they launch the Store App.
Switching Contacts off will turn off the feature for all store teams and they will be unable to keep in touch with shoppers after their initial chat.
We recommend switching Contacts on. For more information on what setting is best for you, please contact your Customer Success Manager.
Team availability
Setting Bambuser Chat to appear based on your team's availability 🌘
You can set On-site Chat to either always appear regardless of your team's availability, or only appear when at least one expert in your team is available to chat.
We usually recommend switching this on. To discuss which is the best setting for you, please speak with your Customer Success Manager.
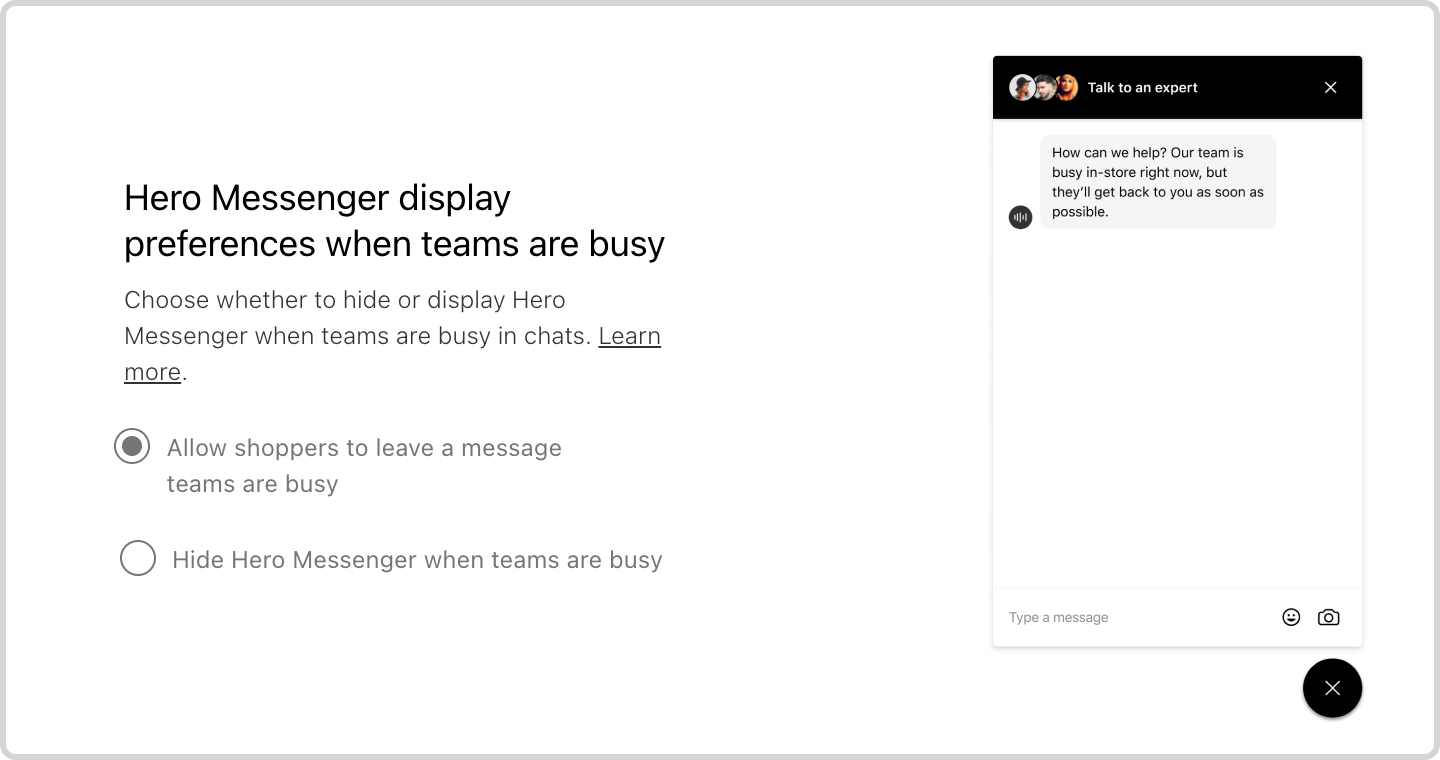
Out of operating hours
Setting Bambuser Chat to appear based on operating hours 🕗

Here you can set whether the On-site Chat plugin will always appear or only when your teams are online.
By allowing shoppers to leave a message at any time, the plugin will show when your teams are busy and when they are offline outside of operating hours.
This will apply even if you've selected to only show the plugin when your teams are available in the previous setting.
We recommend letting shoppers leave a message when your teams are busy or not working so that your shoppers always have a way to get in touch. If you need help working out the best setting for you, please speak with your Customer Success Manager.
Left Message SMS sender ID
Setting the name shoppers see in lead responses 👥
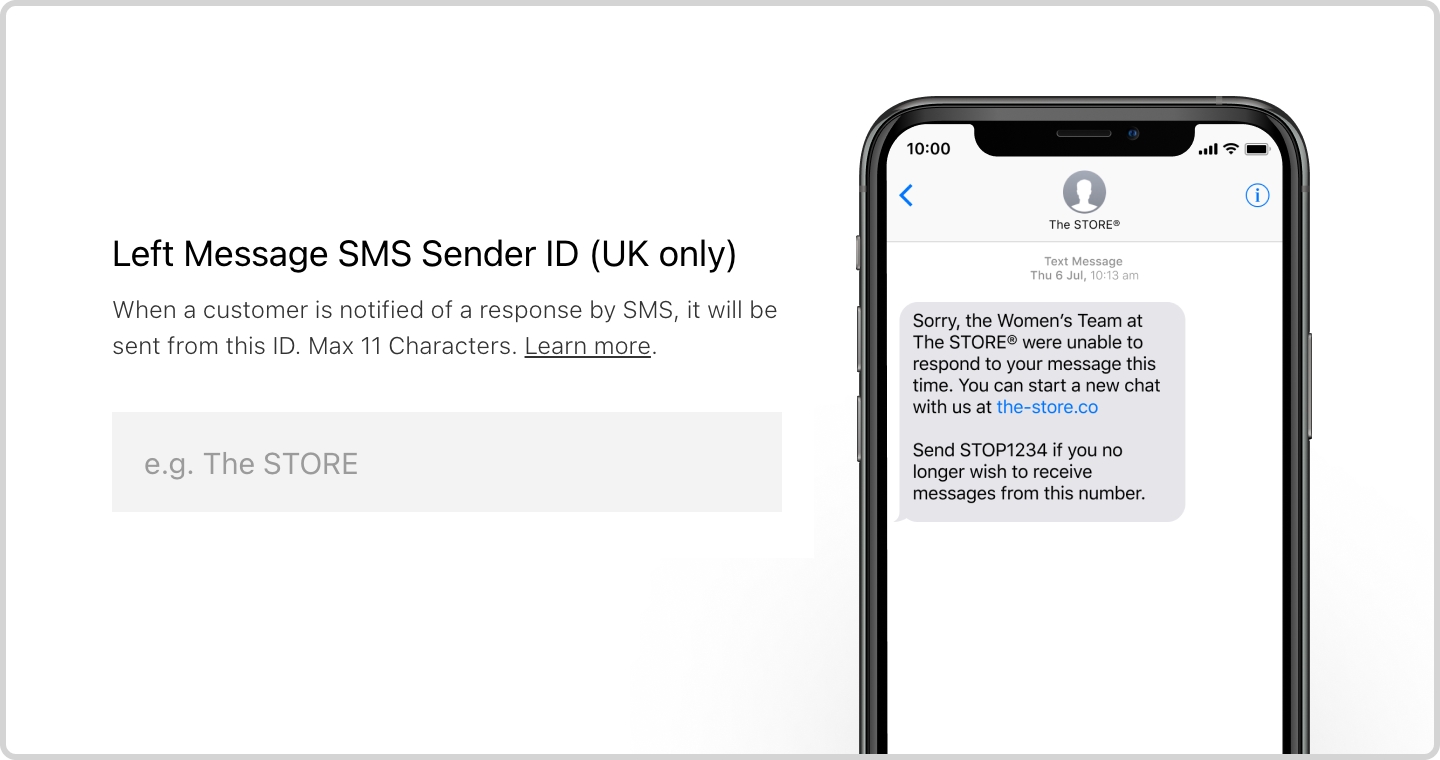
You can determine the name from whom responses to lead messages will be sent.
This feature is currently only available in the United Kingdom.
The Get Notified Sender ID is the contact name that a shopper will see when they receive a response to a lead query. This name will appear instead of a random multi-digit code and is usually best set as your brand name.
To set a Sender ID, users should input a name for their brand between 3 and 11 characters. This name will then appear on all lead responses.
Where possible, we recommend you add a Left Message SMS Sender ID to make the experience feel more branded. We also recommend you add the name of your organization or an abbreviation as this will help shoppers know what to expect from this interaction.
Left Message expired URL
Setting where to send shoppers if their lead query expires 🔗
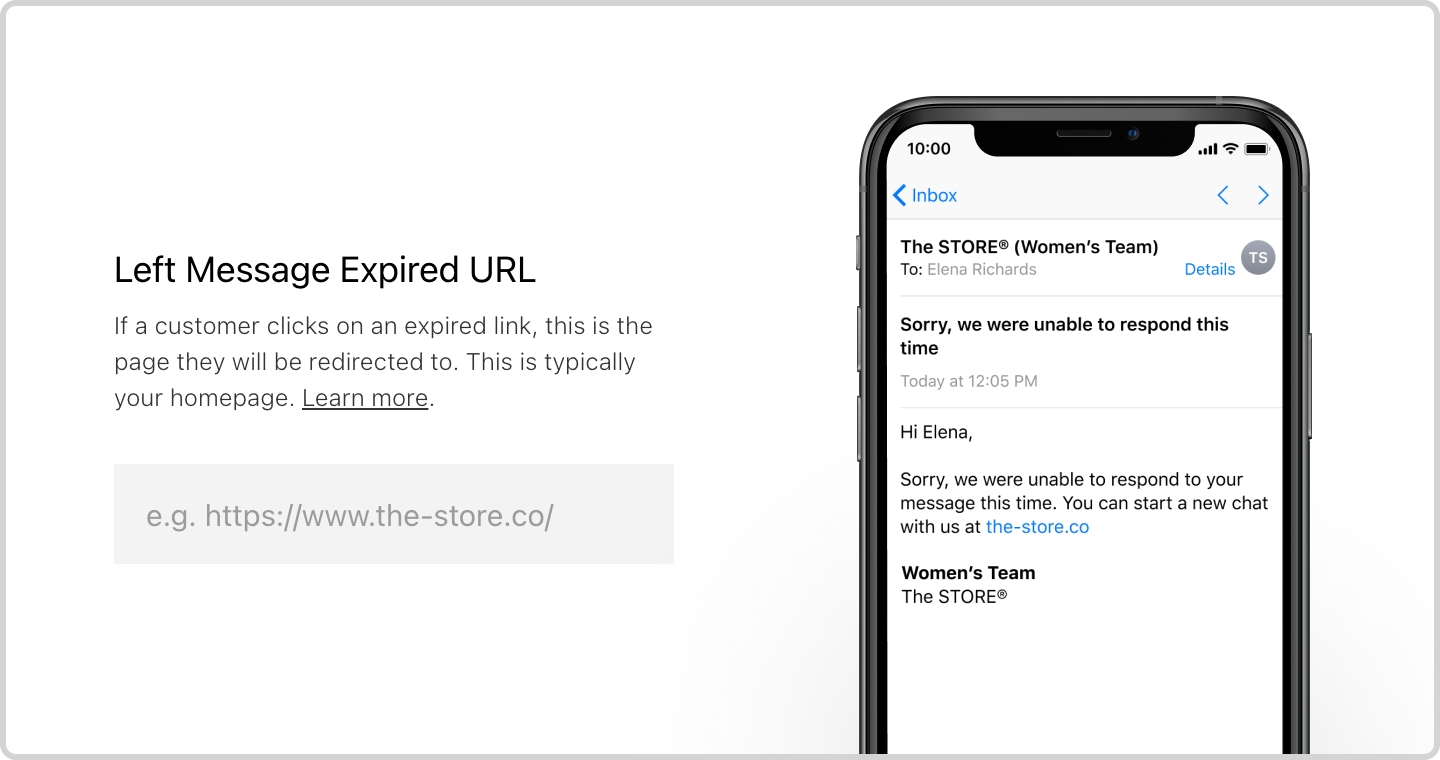
If a team member does not respond to a lead message within 48 hours, the message will expire. In this case, the shopper will receive a message explaining that their chat has expired with a link to direct them as to what to do next.
You can input the URL for directing shoppers when they receive this expiration message.
We recommend you enter your homepage as the Left Message Expired URL as this is usually the most relevant place to send a shopper at this point, regardless of the nature of their lead query.
Department settings
Key information on your departments 🏬 ℹ️

Department Settings provides you with an overview of currently-enabled departments. This is where you can edit any details related to each department.
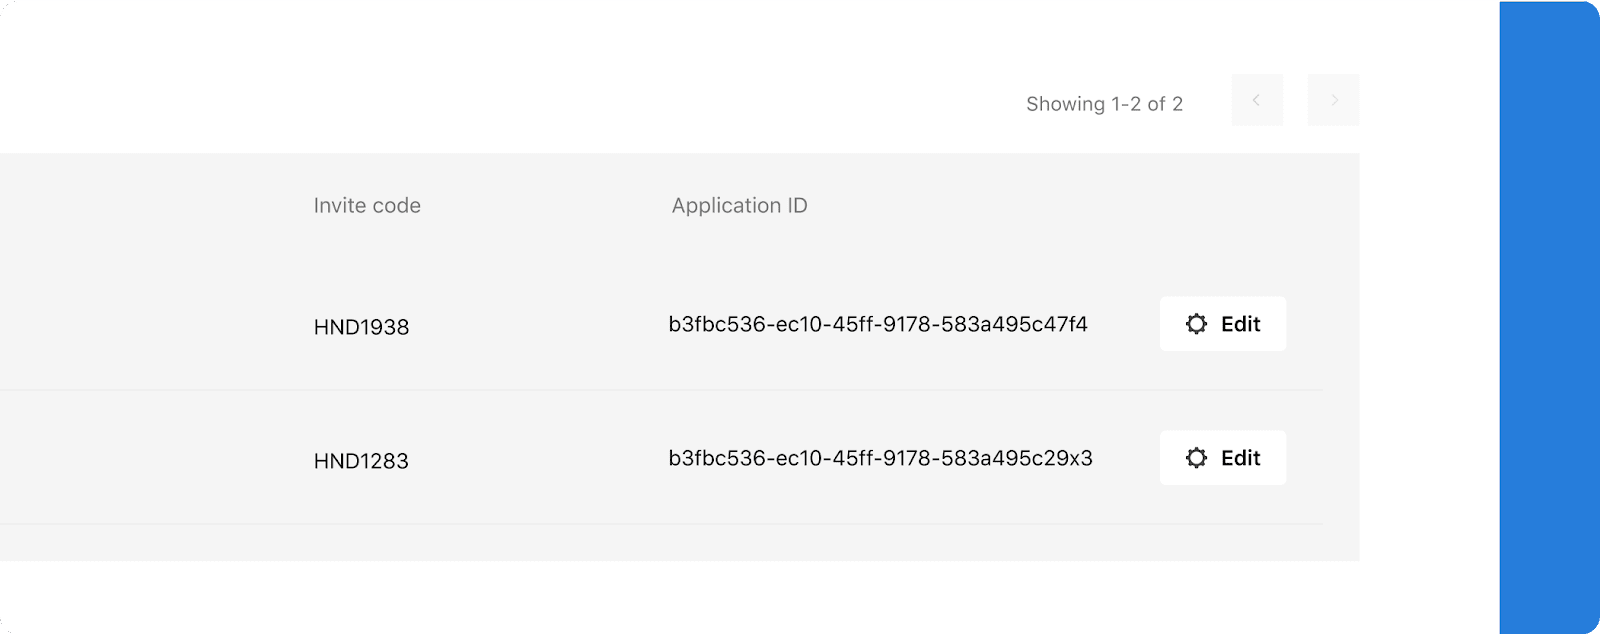
Department Settings provides you with an overview of the all the departments in your organization, and includes key information about each department, specifically:
- Department name
- Number of team members in each department
- Department ID
You can also edit the department's name to repurpose a department if you need to change how you structure teams on Bambuser Chat.
You will need the department ID if you want to implement department filtering, detailed in our technical implementation docs.
It is not possible to deactivate a department in these settings. If you need to do this, please contact Support or your Customer Success Manager.
Adding a new department
Add new departments in Bambuser Chat 🏬 ➕

You can set up new departments in Bambuser Chat to route shoppers to different store teams.
The department creation flow is found under Department Settings.
To create a new department:
- Select 'Add Department' at the bottom of the Department Settings page.
- Use the text input modal to enter a department name.
- Fill in the drop-down format and select an appropriate Product Feed for the department in question.
- Select 'Finish'.
Because this process can have implications for your data, the team, and the shopper experience, we recommend you go through this process with your Customer Success Manager.
Notifications
Here, we cover details related to notifications your team receives from the Bam Hub for various actions surrounding Manage Team, such as when a new team member joins and needs approving to start using the Store App.
Manage Team email notifications
How to set up Manage Team email notifications
Frequently asked questions
Manage Team email notifications
Be informed when product experts register in the Store App.
The Manage Team email notifications feature informs merchant teams when their product experts register in the Bambuser Chat Store App, allowing them to start serving customer chats quicker.
Currently, when a product expert registers for a Store App account, there is nothing to inform merchant teams that they’ve registered and now require approval. If product experts don’t get quick approval for use of the Store App, they are not able to serve customer chats and generate sales.
Email notifications will let merchant teams know how many product experts are pending approval, and give them a direct link to the Manage Team section of the Bam Hub in order to grant quick approval.
Goals of this feature:
✅ To speed up product expert onboarding
✅ To get your team live, quicker
✅ Meet shopper demand for maximum opportunity
Frequently asked questions
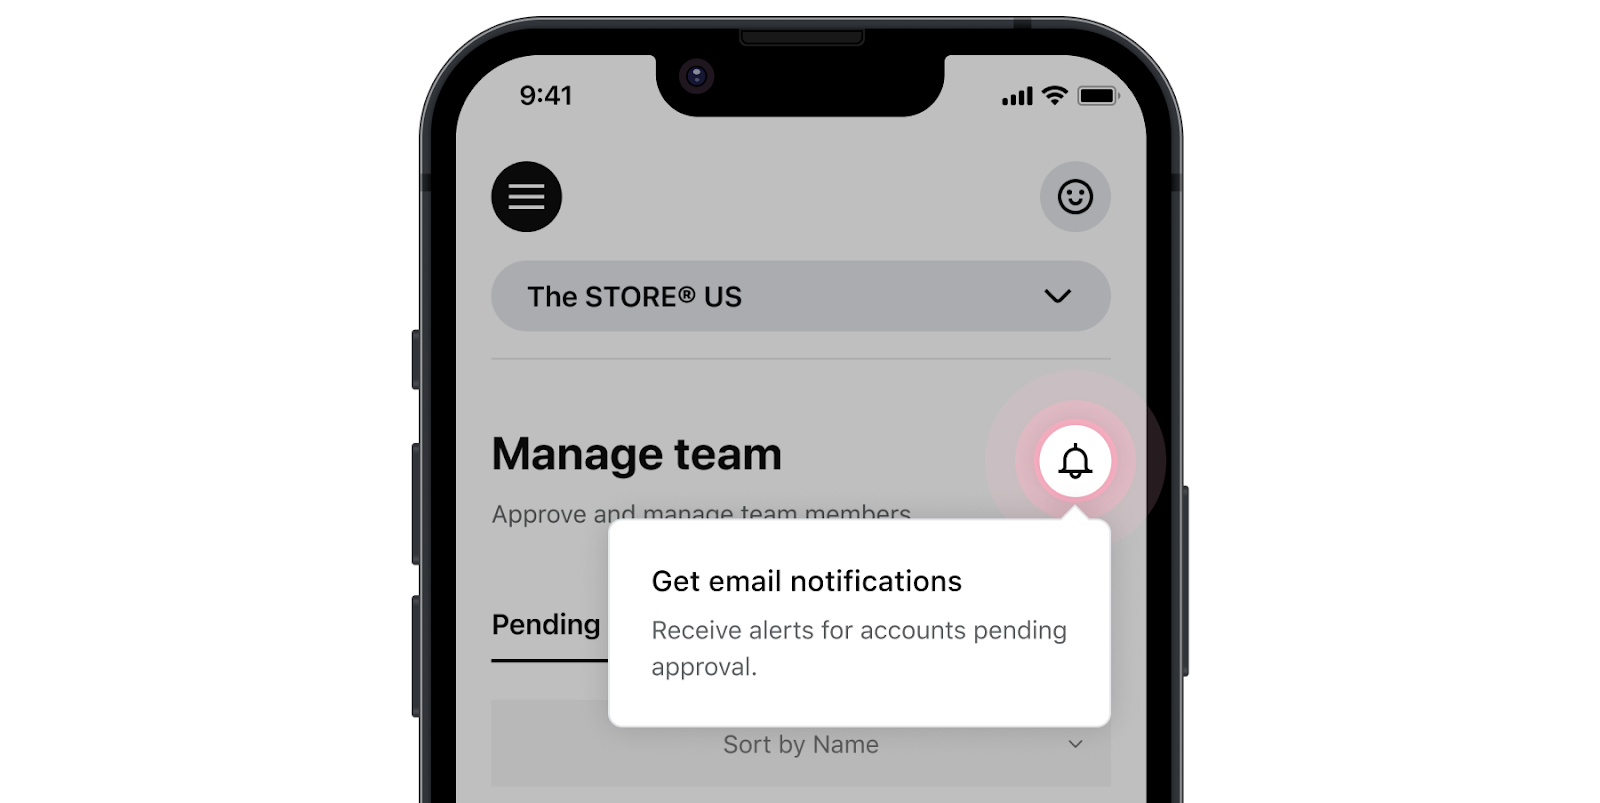
How can I sign up for Manage Team email notifications?
From the right-hand side of the Manage Team section of your the Bam Hub you will see a bell icon. Click the bell icon to display a ‘Manage Notifications’ modal window. From this window, you can search for the Bam Hub users with Manage Team access to sign them up for email notifications.
How frequently will I be sent Manage Team email notifications?
Once signed up for email notifications you will receive one email every 48 hours if there are pending product experts that require approval for the Bambuser Chat Store App. If there are no product experts pending approval, no email notifications will be sent.
Email notifications will be sent at 10:00 UTC.
What information will email notifications contain?
Email notifications will indicate how many product experts are pending approval. A link from the email received will take the user straight to the ‘Manage Team’ section of the Bam Hub so any product experts can be approved to use the Bambuser Chat Store App.
Can I sign anyone up for Manage Team email notifications?
You will only be able to sign up users with a Bam Hub account that already have access to the Manage Team section of the Bam Hub.
All emails sent will come from Bambuser email address.
How do I unsubscribe from Manage Team email notifications?
You can click on the unsubscribe link from any email notification you receive to stop receiving further email notifications.
Will a Bam Hub user still receive notifications if their account has been deactivated?
No, if a Bam Hub user’s account is deactivated, we automatically remove them from the subscription list for email notifications.
Am I able to change how frequently I receive email notifications?
No, currently all email notifications will be sent at 10:00 UTC.
Chat web app browser notification
What is it?
This feature enables notifications for new incoming chats and messages when the agent is not actively viewing the chat window.
Why was this developed?
- To ensure agents using the Chat web app do not miss any chat messages.
- To support agents managing conversations across multiple brands and BamHub browser tabs simultaneously.
How to enable browser notifications for the Chat web app
- Verify Chat Agent Role: Ensure you possess the "Chat Agent" role within BamHub. This permission must be granted by another user with "Manage Users" access.
- Enable Notifications:
- Navigate to your "Profile" located in the left-side menu.
- Toggle the "Allow browser notifications" setting to the on position.
- Click the "Save" button to apply your settings.
- Receive Notifications:
- Set your status to "online" to begin receiving incoming chats.
- While using other browser tabs, you will now receive browser notifications for new incoming chats and messages.
| Verify Chat Agent Role | Enable Notifications |


If browser notifications are not working, please check the following:
- Browser Settings: Ensure notifications are enabled for lcx.bambuser.com (US) or lcx-eu.bambuser.com (EU) within your browser's settings.
- OS Settings: Verify that notifications are enabled for your browser in your computer's operating system settings.
- Browser Mode: Confirm you are not using incognito mode or a guest profile in your browser.
- Focus Assist: Check that focus assist or a similar feature is not enabled on your computer.