Split Screen is a Social Commerce (1:M) product feature that allows you to create a live video shopping show with multiple participants joining as hosts using their iPhones.
This guide walks you through setting up a live show with Split Screen enabled and using the Bambuser Live Shopping iOS app to host a show.
Setting up your show
-
Create a show
Login to your production dashboard and click on ‘Shows’ in the global nav on the left side of the website. Now click the ‘Create Show’ button on the top right.
-
Add show metadata
Add the core show metadata, including the title and description. You can also import the products from your website that you want to display during the show.
-
Select co-host(s)
Click the ‘Add Guest Host’ button and select the other user(s) you want to be invited to co-host the show. This person must have a Host account in your dashboard.
Congratulations on creating your Split Screen show - now you just need to download the Bambuser LiveShopping app on your iOS device and make sure your co-host(s) have the app installed as well. Split Screen is an iOS-only feature for the time being.
Broadcasting from the App
You need to download and install the Bambuser Live shopping app from the Apple iOS app store - it can be found here: https://apps.apple.com/us/app/bambuser-liveshopping/id1476377059
-
Navigate to your upcoming show
Find the Split Screen show you created earlier (only assigned Hosts will be able to see it) and tap it to enter. Review your product list and tap ‘Get Ready’ to begin launching the show.
-
Launch the Waiting Room
In the Camera Preview room, tap ‘Continue’ to launch the Waiting Room. Until you hit ‘Go Live’ the broadcast has not started, and you are in a private room with the other hosts.
-
Go Live to the world
You will get a three-second countdown, and then the show state will switch to ‘Live’ in the top right of the screen - you are now broadcasting publicly to the show page.

Template Switching
Layout template options
Bambuser’s Split Screen service allows you to customise the output of your live show, with four layout templates currently available to choose from:

You can initially choose the layout in the Preview screen before entering the Waiting Room, but can also use the template switcher at any time during the show to change the layout instantly - just open the Layout Template Switcher from the bottom menu in the Split Screen broadcast page:

Get inspired!
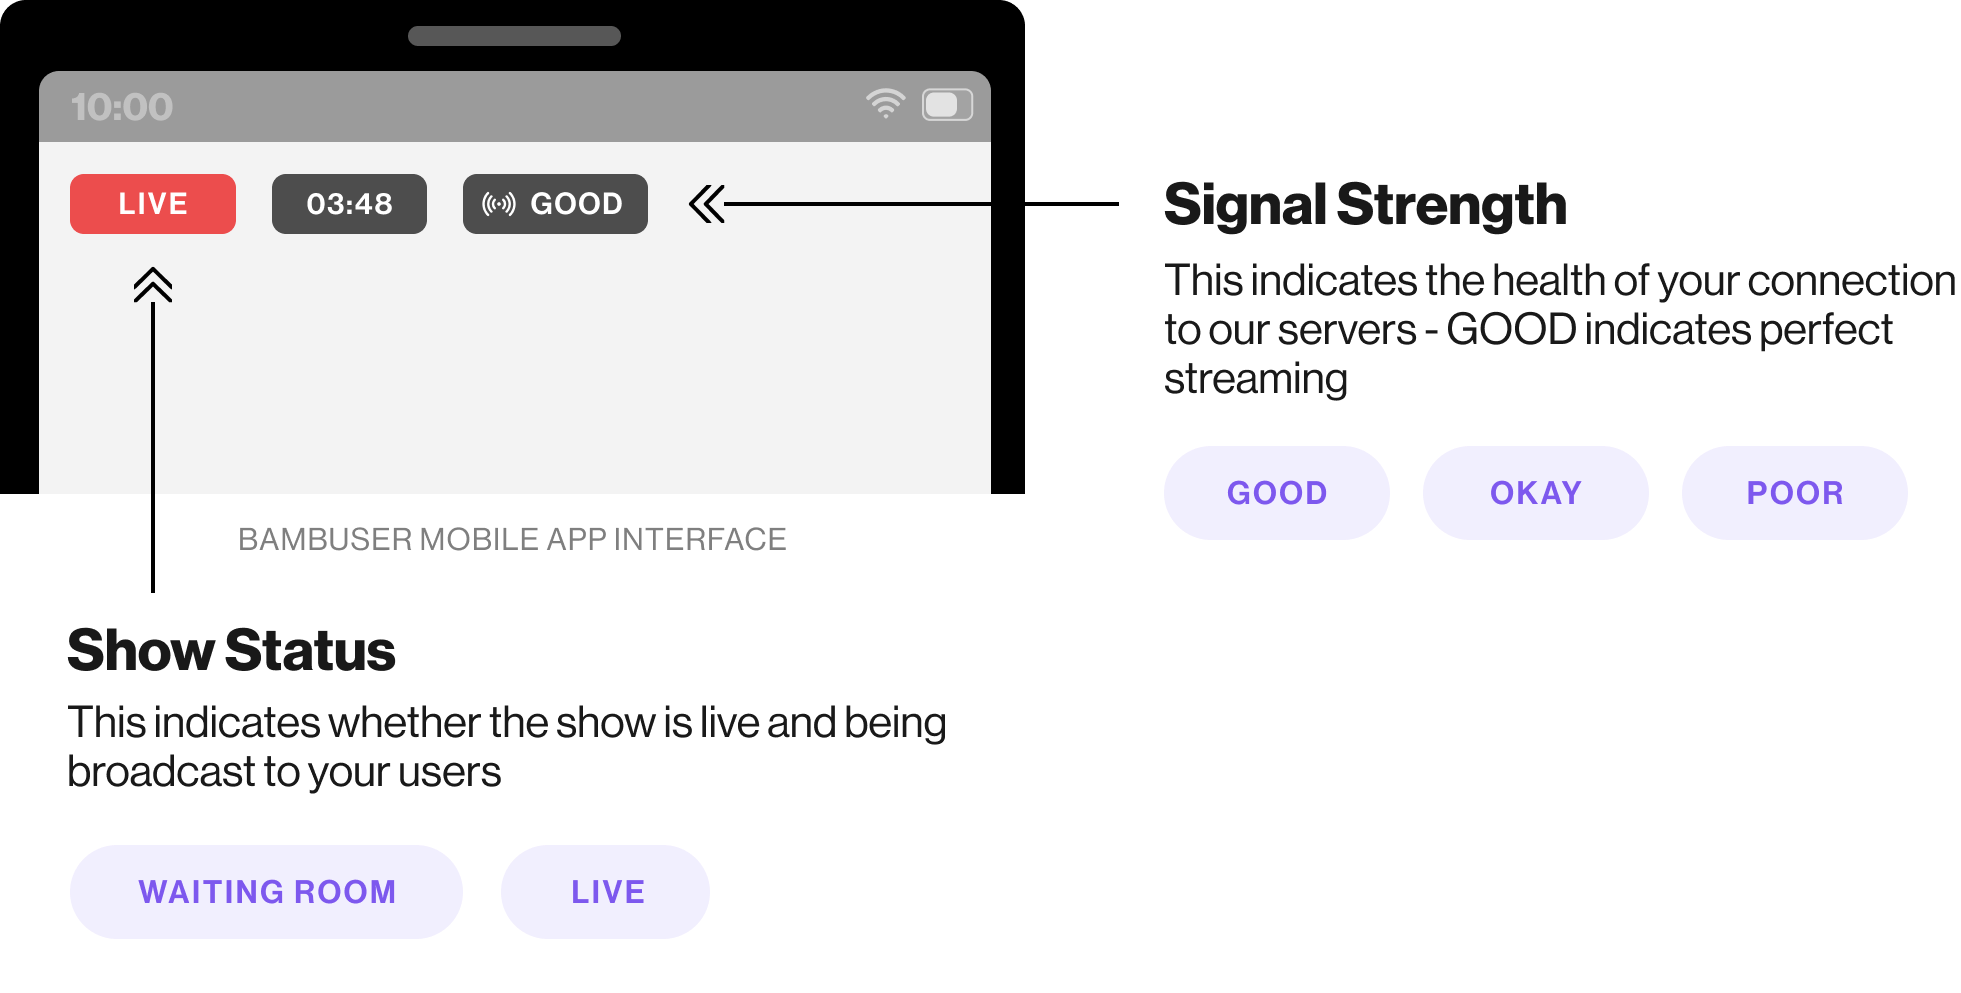
Broadcast State in the App
The app provides real-time feedback on the state of your connection and the broadcast stream. This is included in the app UI to help you understand your local connection's health and the live show's state published to your end consumer.

Broadcasting Best Practices
Broadcasting from the app requires you to have a stable, consistent network connection - we would strongly recommend that you try to match or exceed the following guidelines:
- Download and upload connection exceeding 10 Mbps
- Connection to an enterprise wifi network is strongly preferred, but 4G/5G is also acceptable as long as at least two consecutive speed tests exceed the above
- A fully charged iPhone, preferably plugged into a charging cable for the duration of the broadcast - capturing, encoding, and streaming video will drain your battery
- The newer and more powerful the iPhone, the better - while all modern iPhones tend to have acceptable cameras, the latest ones will capture the best-looking video
- Broadcasting phones set to Do Not Disturb to avoid phone call interruptions
Optimizing audio
For great sounding audio we recommend either using a reliable bluetooth earphone with an integrated microphone (like an Apple Airpod) or investing in a small lightning-connected shotgun mic (Rode sell a very good one for ~€60, the VideoMic ME-L). This is particularly important if the host is going to be more than 1-metre away from their phone.
This provides much clearer audio than the iPhone’s built in speaker mic, which is not designed for longer distance audio capture, and reduces the risk of audio feedback from one of the hosts during a show.
Reconnecting to a show
Network disconnections
If you have a local network issue, your phone will disconnect from the show, and you will no longer appear in the output video to your viewers. During this time, the other host will see that your video and audio have frozen and is no longer available.
To reconnect, you just need to re-establish a reliable network connection, and the app will automatically add you back into the show - you do not need to do anything to trigger that reconnection.
If you are unsure if you are back in the show after a disconnection, you can always check the show video player on your website or from the Bambuser content management system.
Backgrounding
If you background the app (e.g, you swipe the app into a backgrounded state or you open another app while you are broadcasting), you will not immediately disconnect from the show, but instead your video will freeze in a blurred state, and the audio will continue.
Please note: iOS devices may terminate your broadcasting session if you background the app and there is any resource contention during this period e.g, if you take a phone call - your device will not maintain your audio output to the live show. If this happens, you will need to follow the reconnection flow above.